This post may contain affiliate links. Please see our disclosure policy.
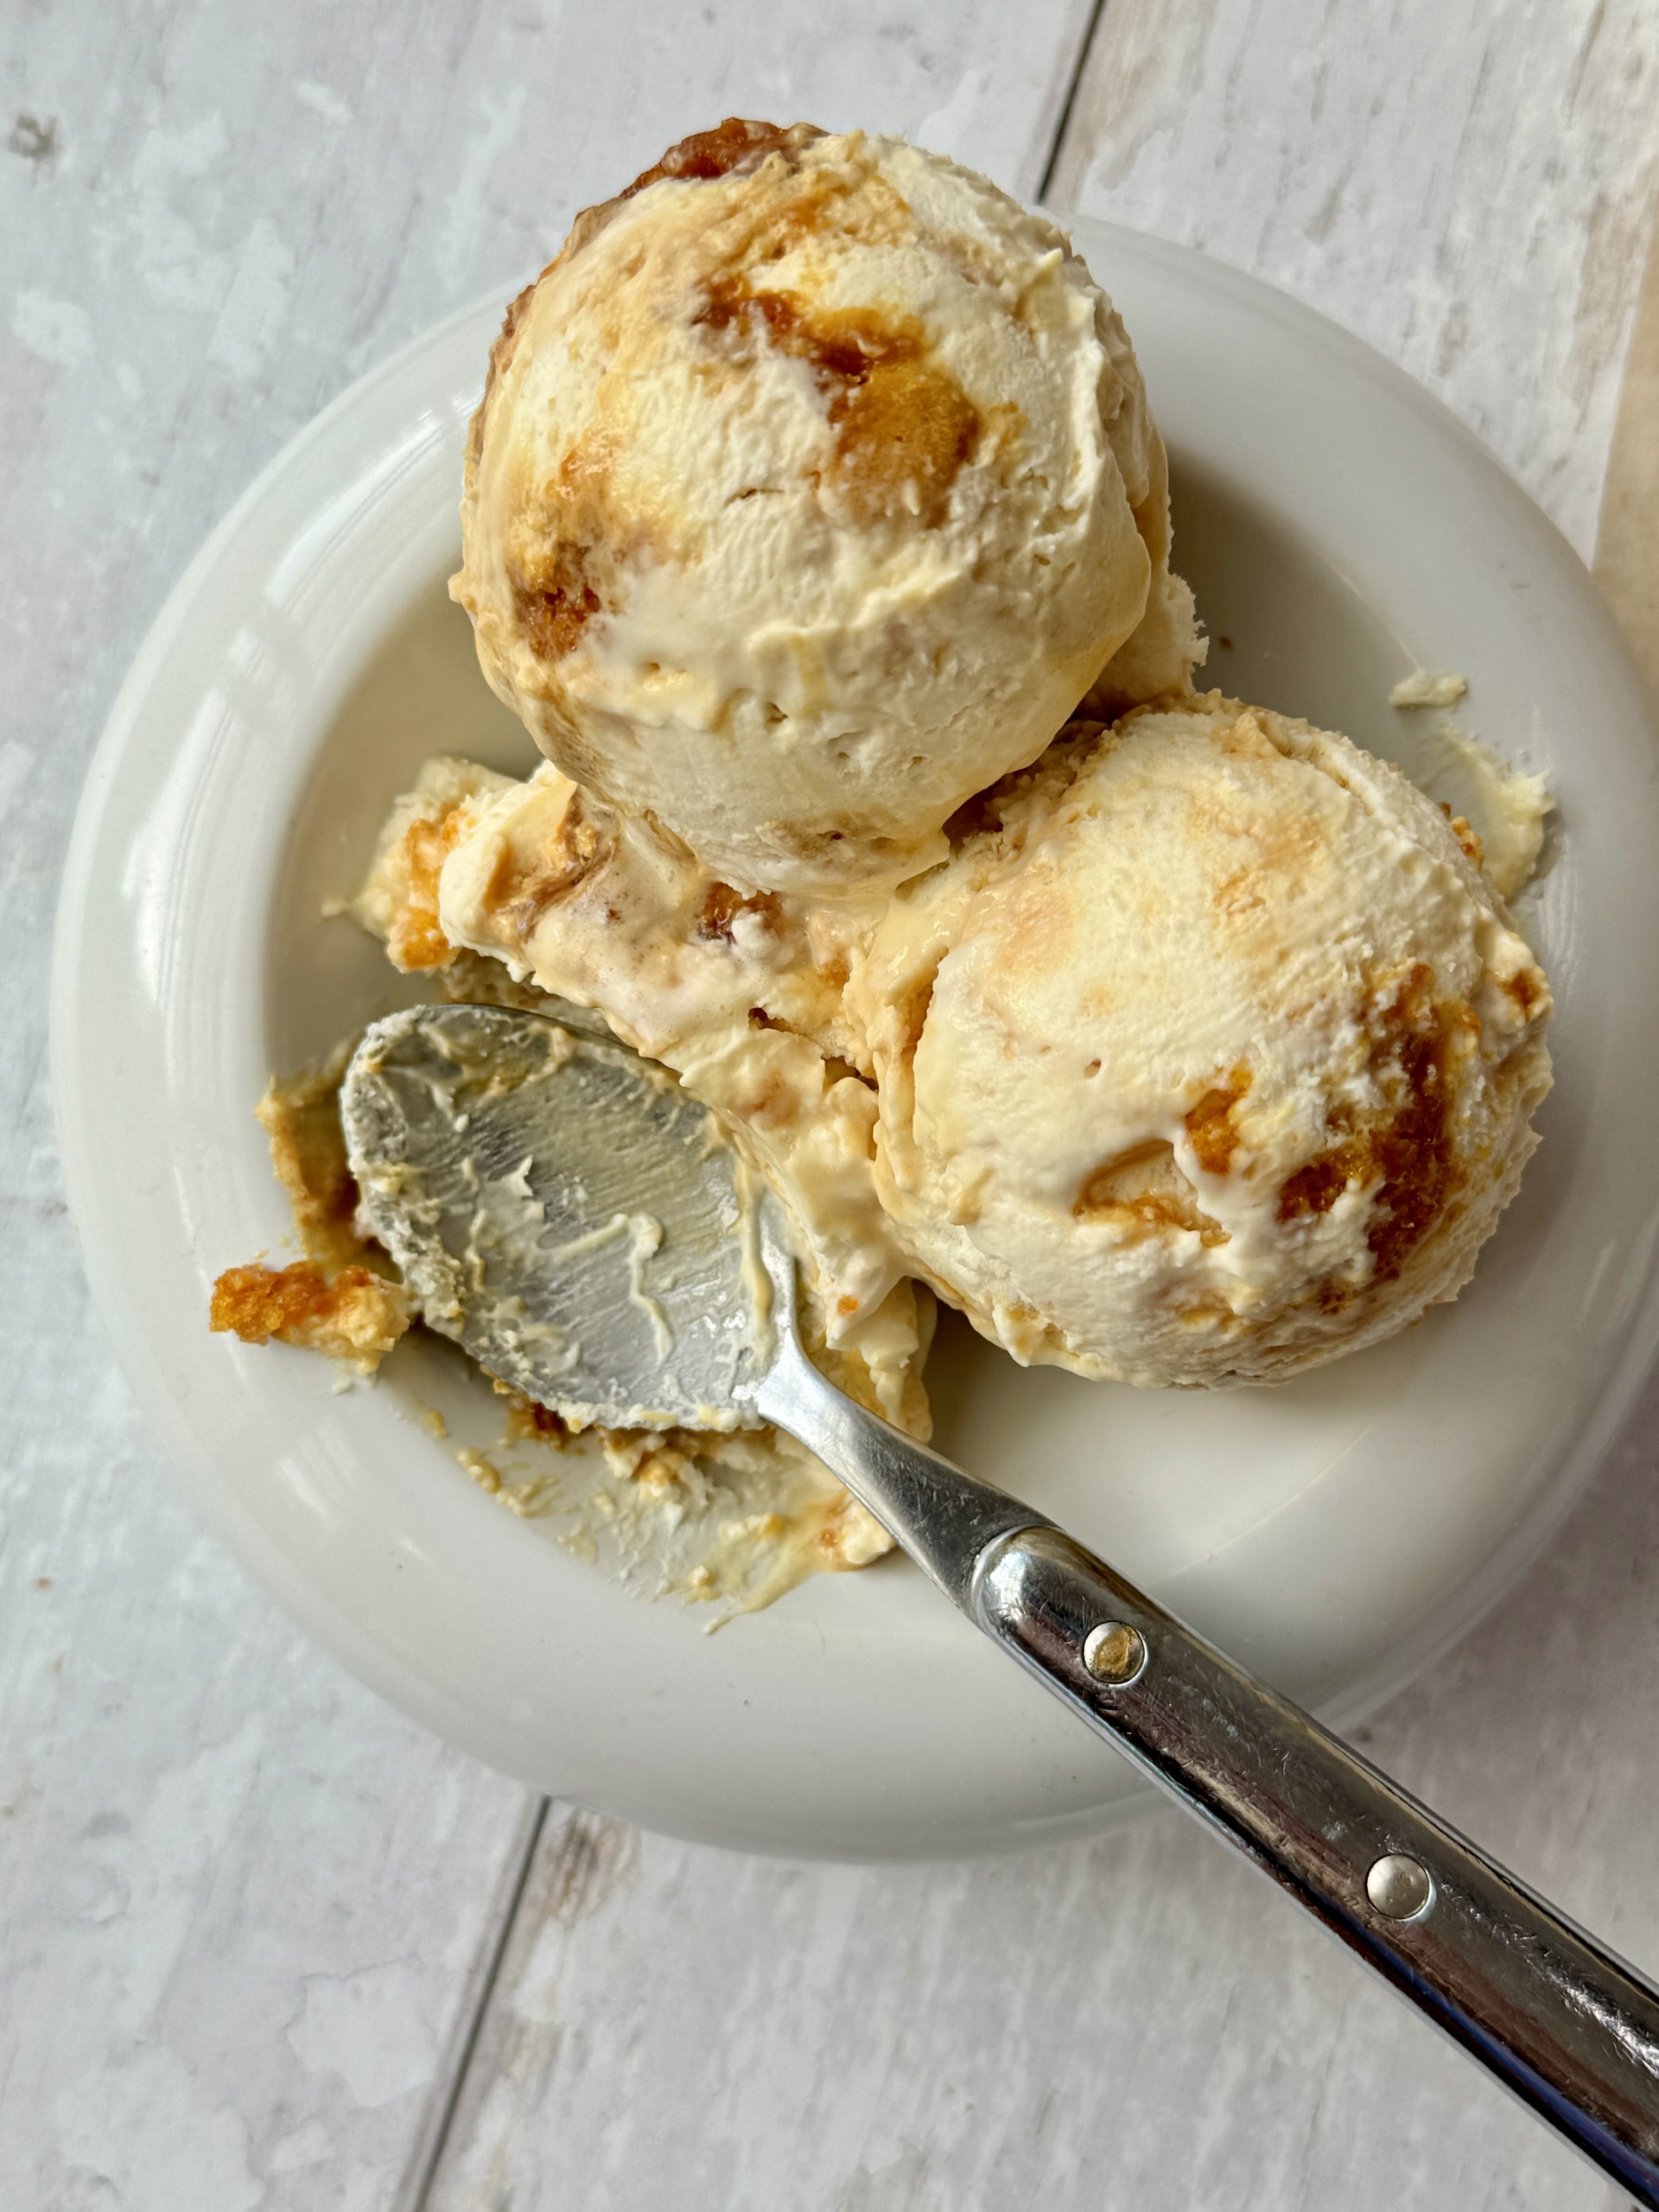
I think honeycomb ice cream is my favourite ice cream of all time! This Homemade Honeycomb Ice Cream recipe is my super easy and delicious version. Think of it as a ‘cheat’s ice cream’. Imagine creamy ice cream with sweet, crunchy honeycomb pieces. Honestly, it has the most dreamy melt-in-the-mouth texture that never gets icy. Perfect to serve on its own or alongside your favourite puddings…
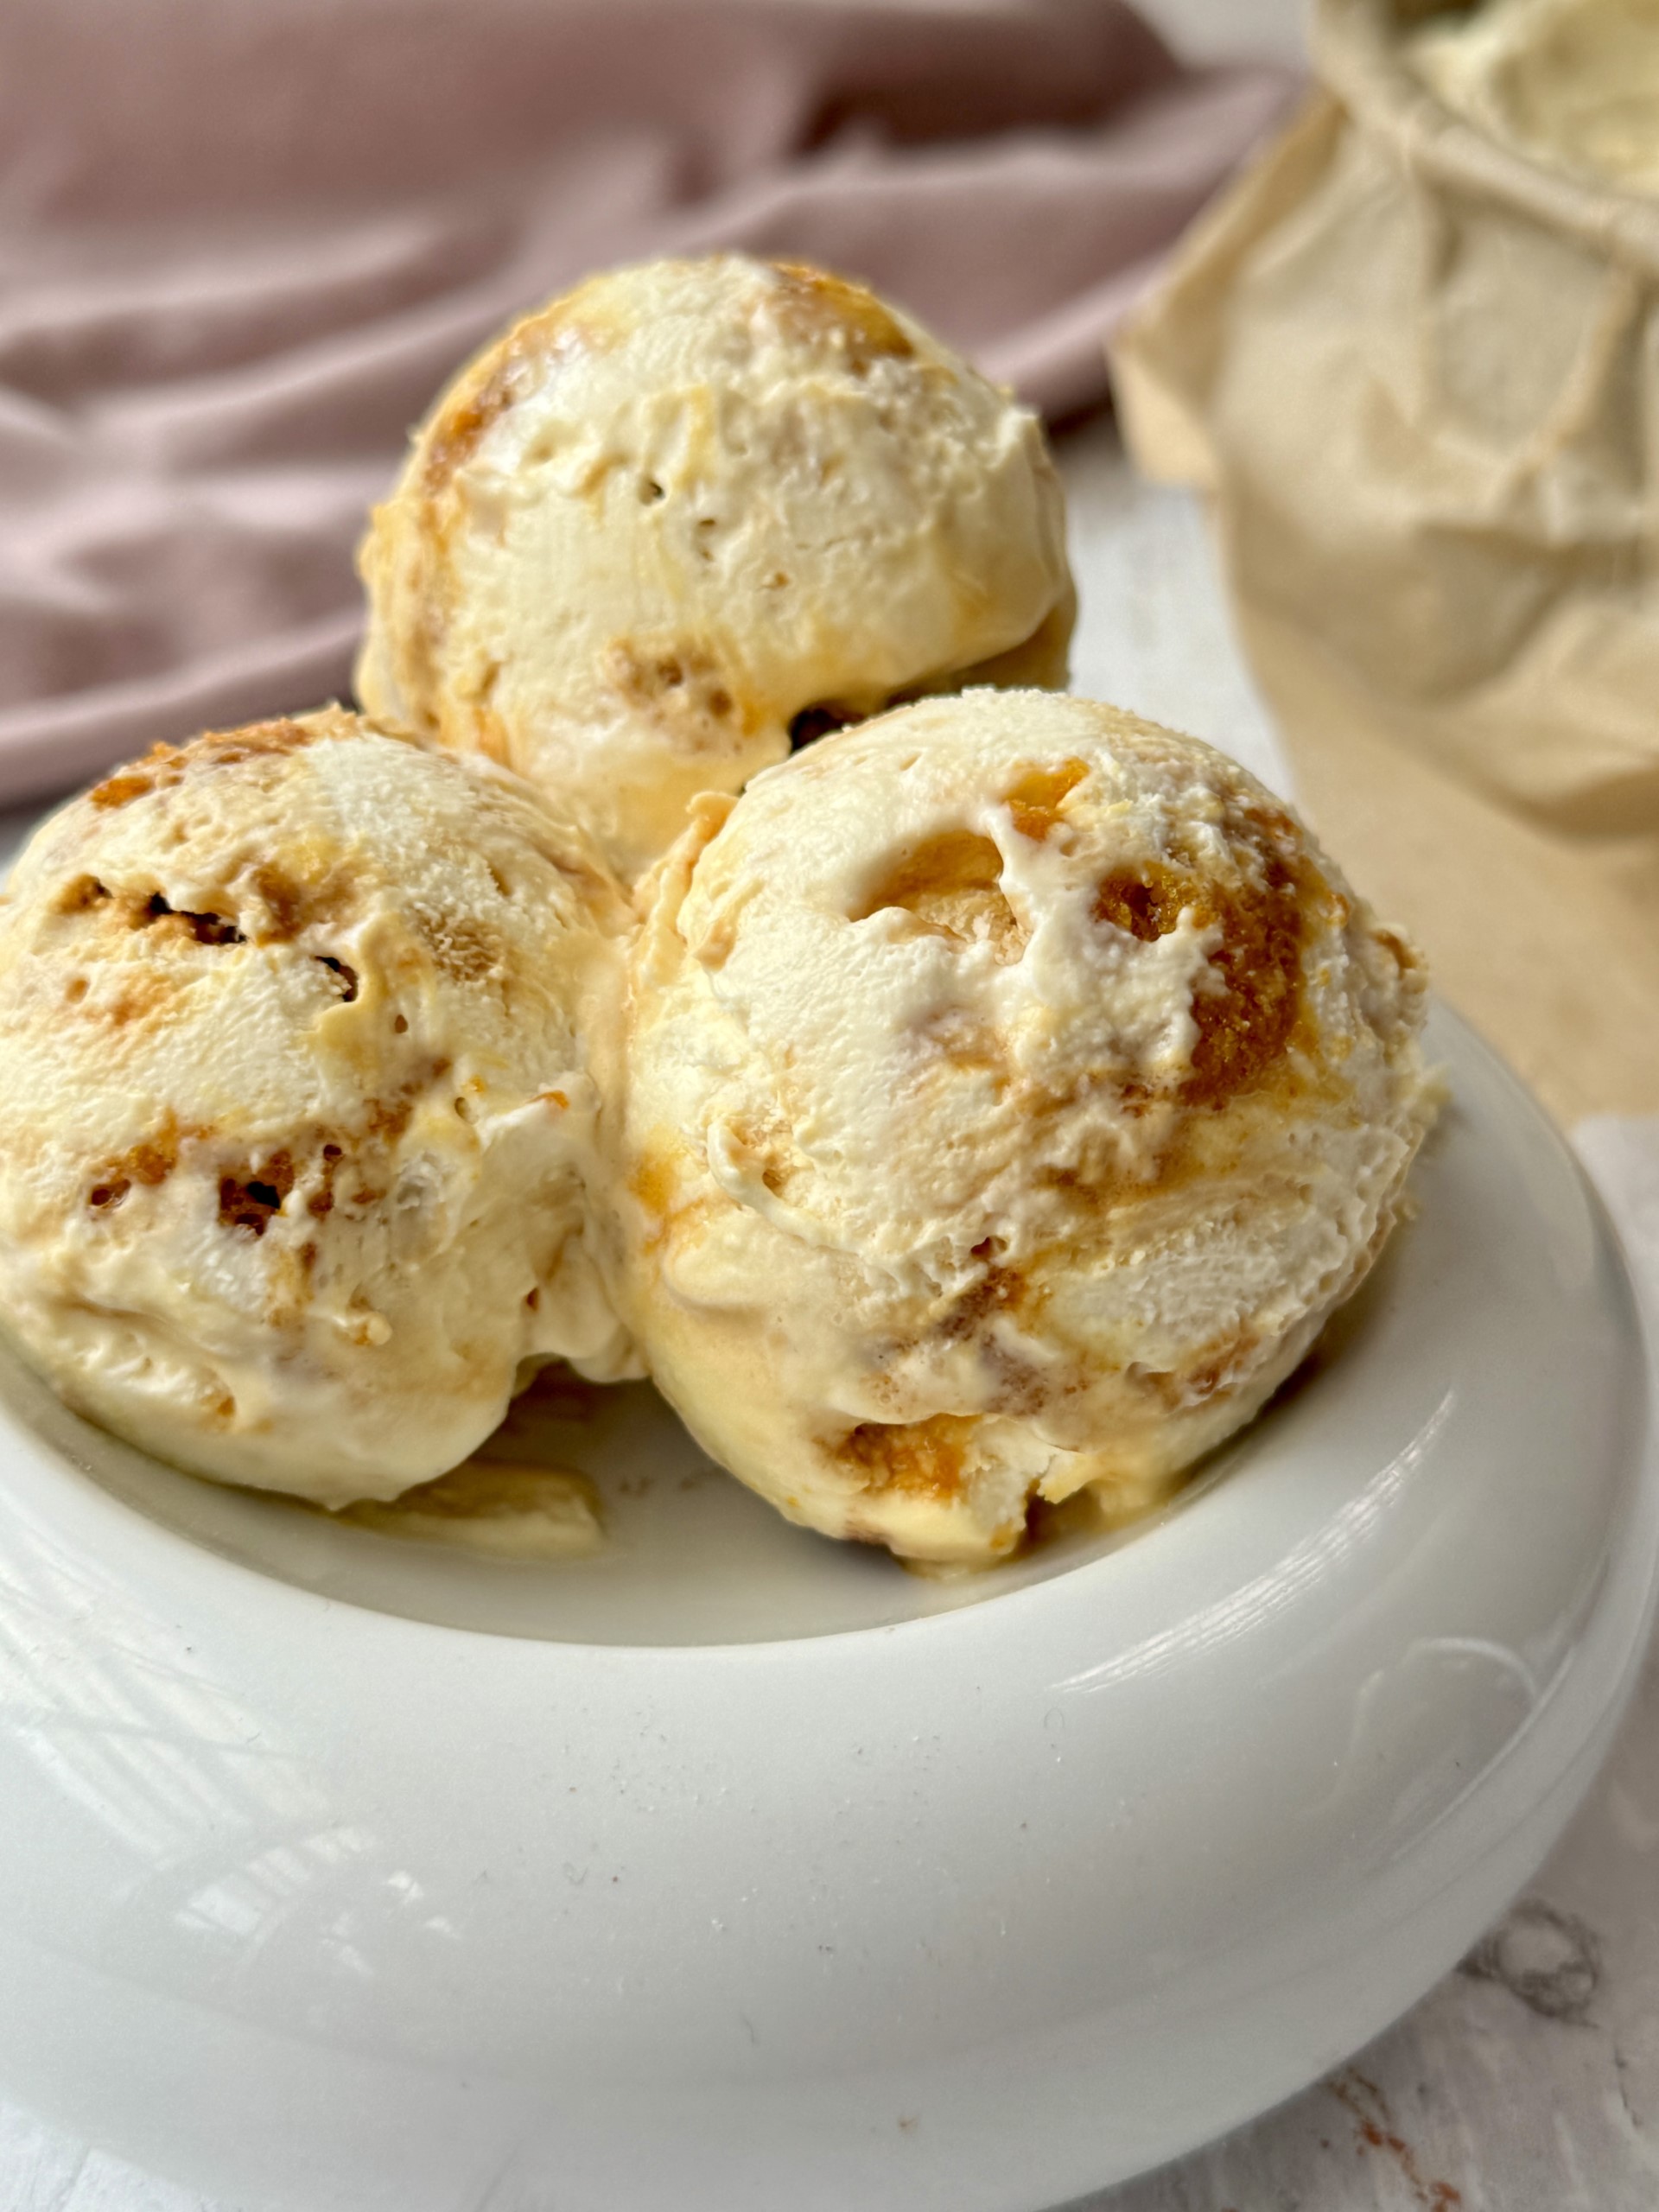
I think there is a big misconception that homemade ice cream is complicated and needs an ice cream machine. But this isn’t always the case, and this recipe is a great example! The secret? Condensed milk! I added homemade honeycomb to this recipe, but the base uses just 2 ingredients. It is almost unbelievably easy and you can customise it with all sorts of ingredients. Trust me, once you start making your own ice cream, there is no going back…
Table of Contents
Why you will love this recipe:
- It is simple and uses just 5 ingredients you probably already have in your fridge and cupboards.
- It can be made ahead so it is an ideal simple dinner party dessert.
- It is perfect to serve as a lighter dessert or alongside other puddings.
- It is full of flavour and texture thanks to the sweet condensed milk, crunchy honeycomb chunks and creamy whipped cream.
- It is super versatile. You can switch up the honeycomb for chopped chocolate, nuts or chocolate pieces and drizzle in different sauces.
- It has no eggs so you don’t have to worry about serving homemade ice cream with partially cooked eggs to friends and family. This is an egg-free ice cream everyone can enjoy!
Ingredients:
Full recipe can be found in the printable recipe card at the bottom of the post, just scroll down!
Golden syrup – this is one of the base ingredients for the homemade honeycomb. It creates the most delicious sweet, buttery flavour.
Caster sugar – this is key for the base of the honeycomb ice cream. Don’t be tempted to swap for brown sugar as they have more moisture which will impact the texture and set.
Bicarbonate of soda – this reacts with the sugar to create the light, bubbly texture that honeycomb is so famous for.
Double cream – you must use double (heavy) cream in this recipe, single cream won’t whip up or set as well.
Condensed milk – I always have a tin of condensed milk in my cupboards. It is so good for whipping up a batch of easy fudge or super easy no-churn honeycomb ice cream!
Substitutions and Variations:
Honeycomb: if you don’t want to make your own honeycomb, simply roughly chop a crunchie chocolate bar. You can also find honeycomb pieces in some supermarkets. They tend to be smaller, around the size of a chocolate chip. Alternatively, you could swap for fudge pieces.
Golden syrup: you can make honeycomb with runny honey instead of golden syrup. Unsurprisingly, it will have a more floral ‘honey’ flavour! Maple syrup also works really well, but is more expensive.
Chocolate: build on the crunchie chocolate bar vibes by adding dark chocolate to your honeycomb ice cream. Chopped dark chocolate chunks add a deliciously crunchy texture. I also love to swirl through some glossy melted dark chocolate instead. The intensity of the dark chocolate complements the sweet honeycomb perfectly. However, you could use milk or white chocolate if you prefer.
Nuts: if you love a crunchy, creamy ice cream, throw in a handful of chopped nuts. Almonds and hazelnuts both work really well. Don’t forget to toast them first for extra flavour!
Here’s how to make Easy Honeycomb Ice Cream:
Here’s a step-by-step guide for what you need to do, but you can find the full recipe at the bottom of the page for detailed instructions.
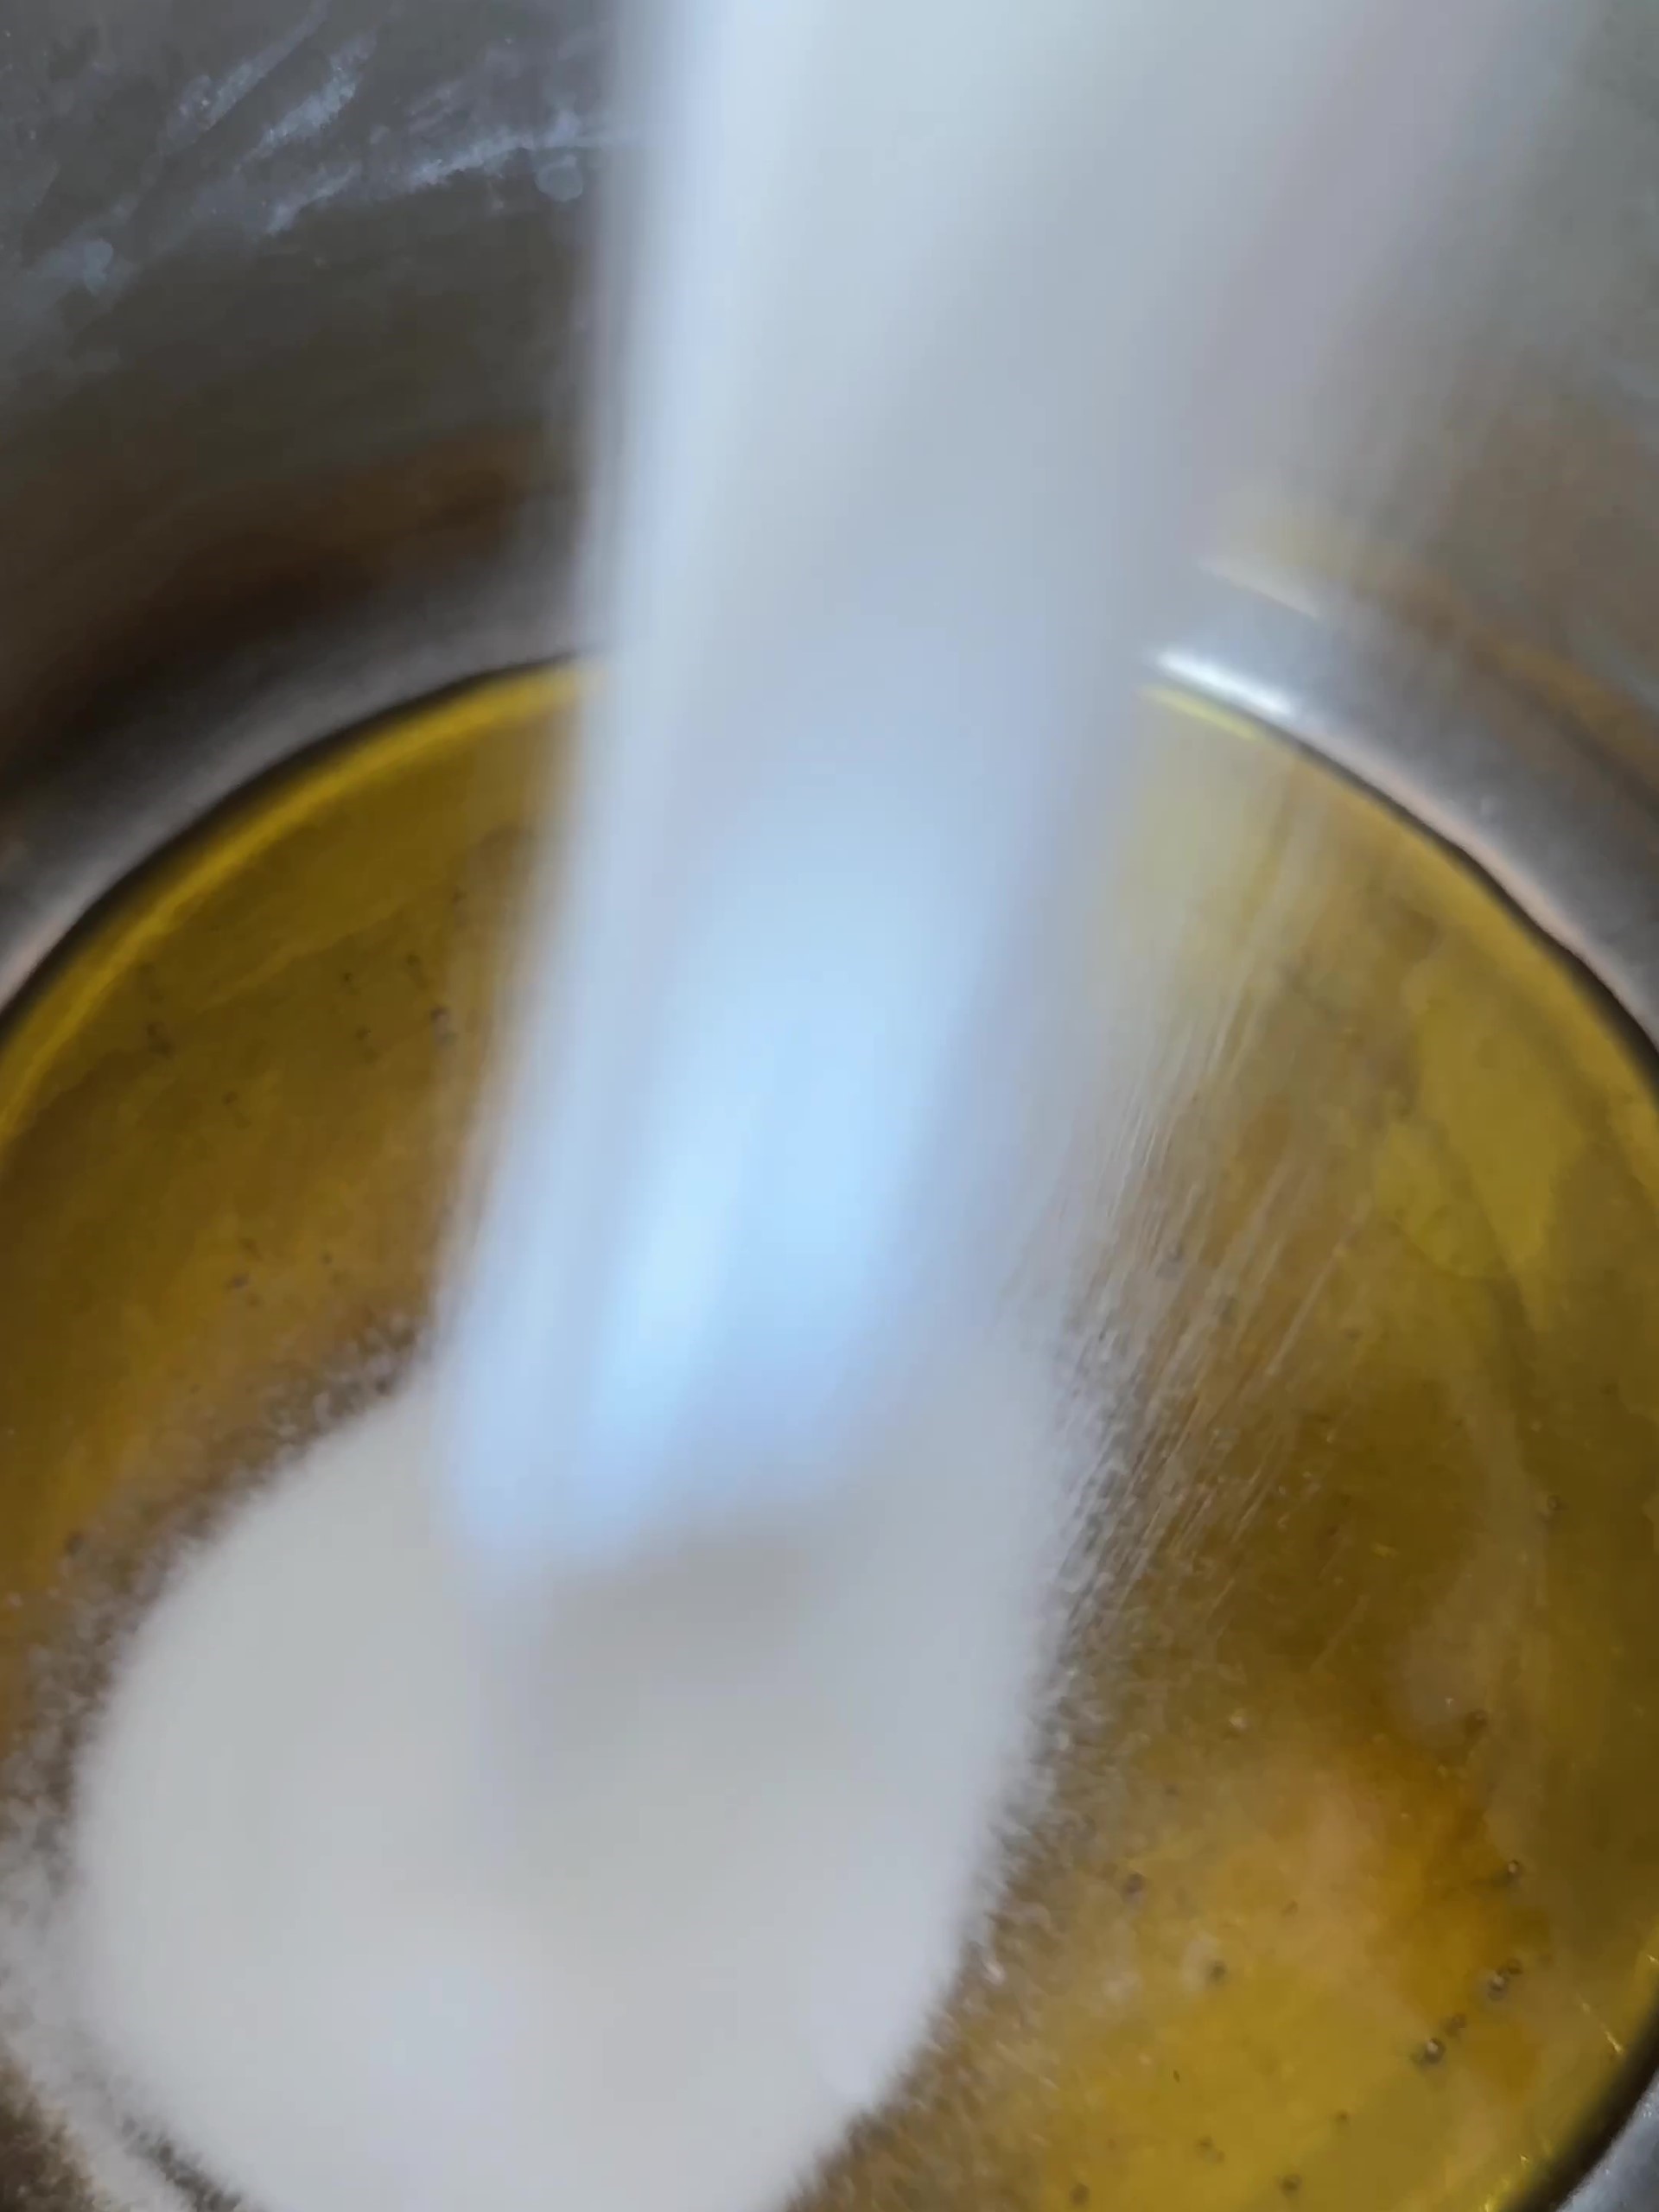
ONE: For the honeycomb – Gently heat the golden syrup, add sugar and bring to the boil, swirling the pan to stop it from burning.
TWO: Remove from the heat and shoot in the bicarbonate of soda. Stir quickly and confidently – you don’t want to overmix it but you do want it to be completely dissolved.
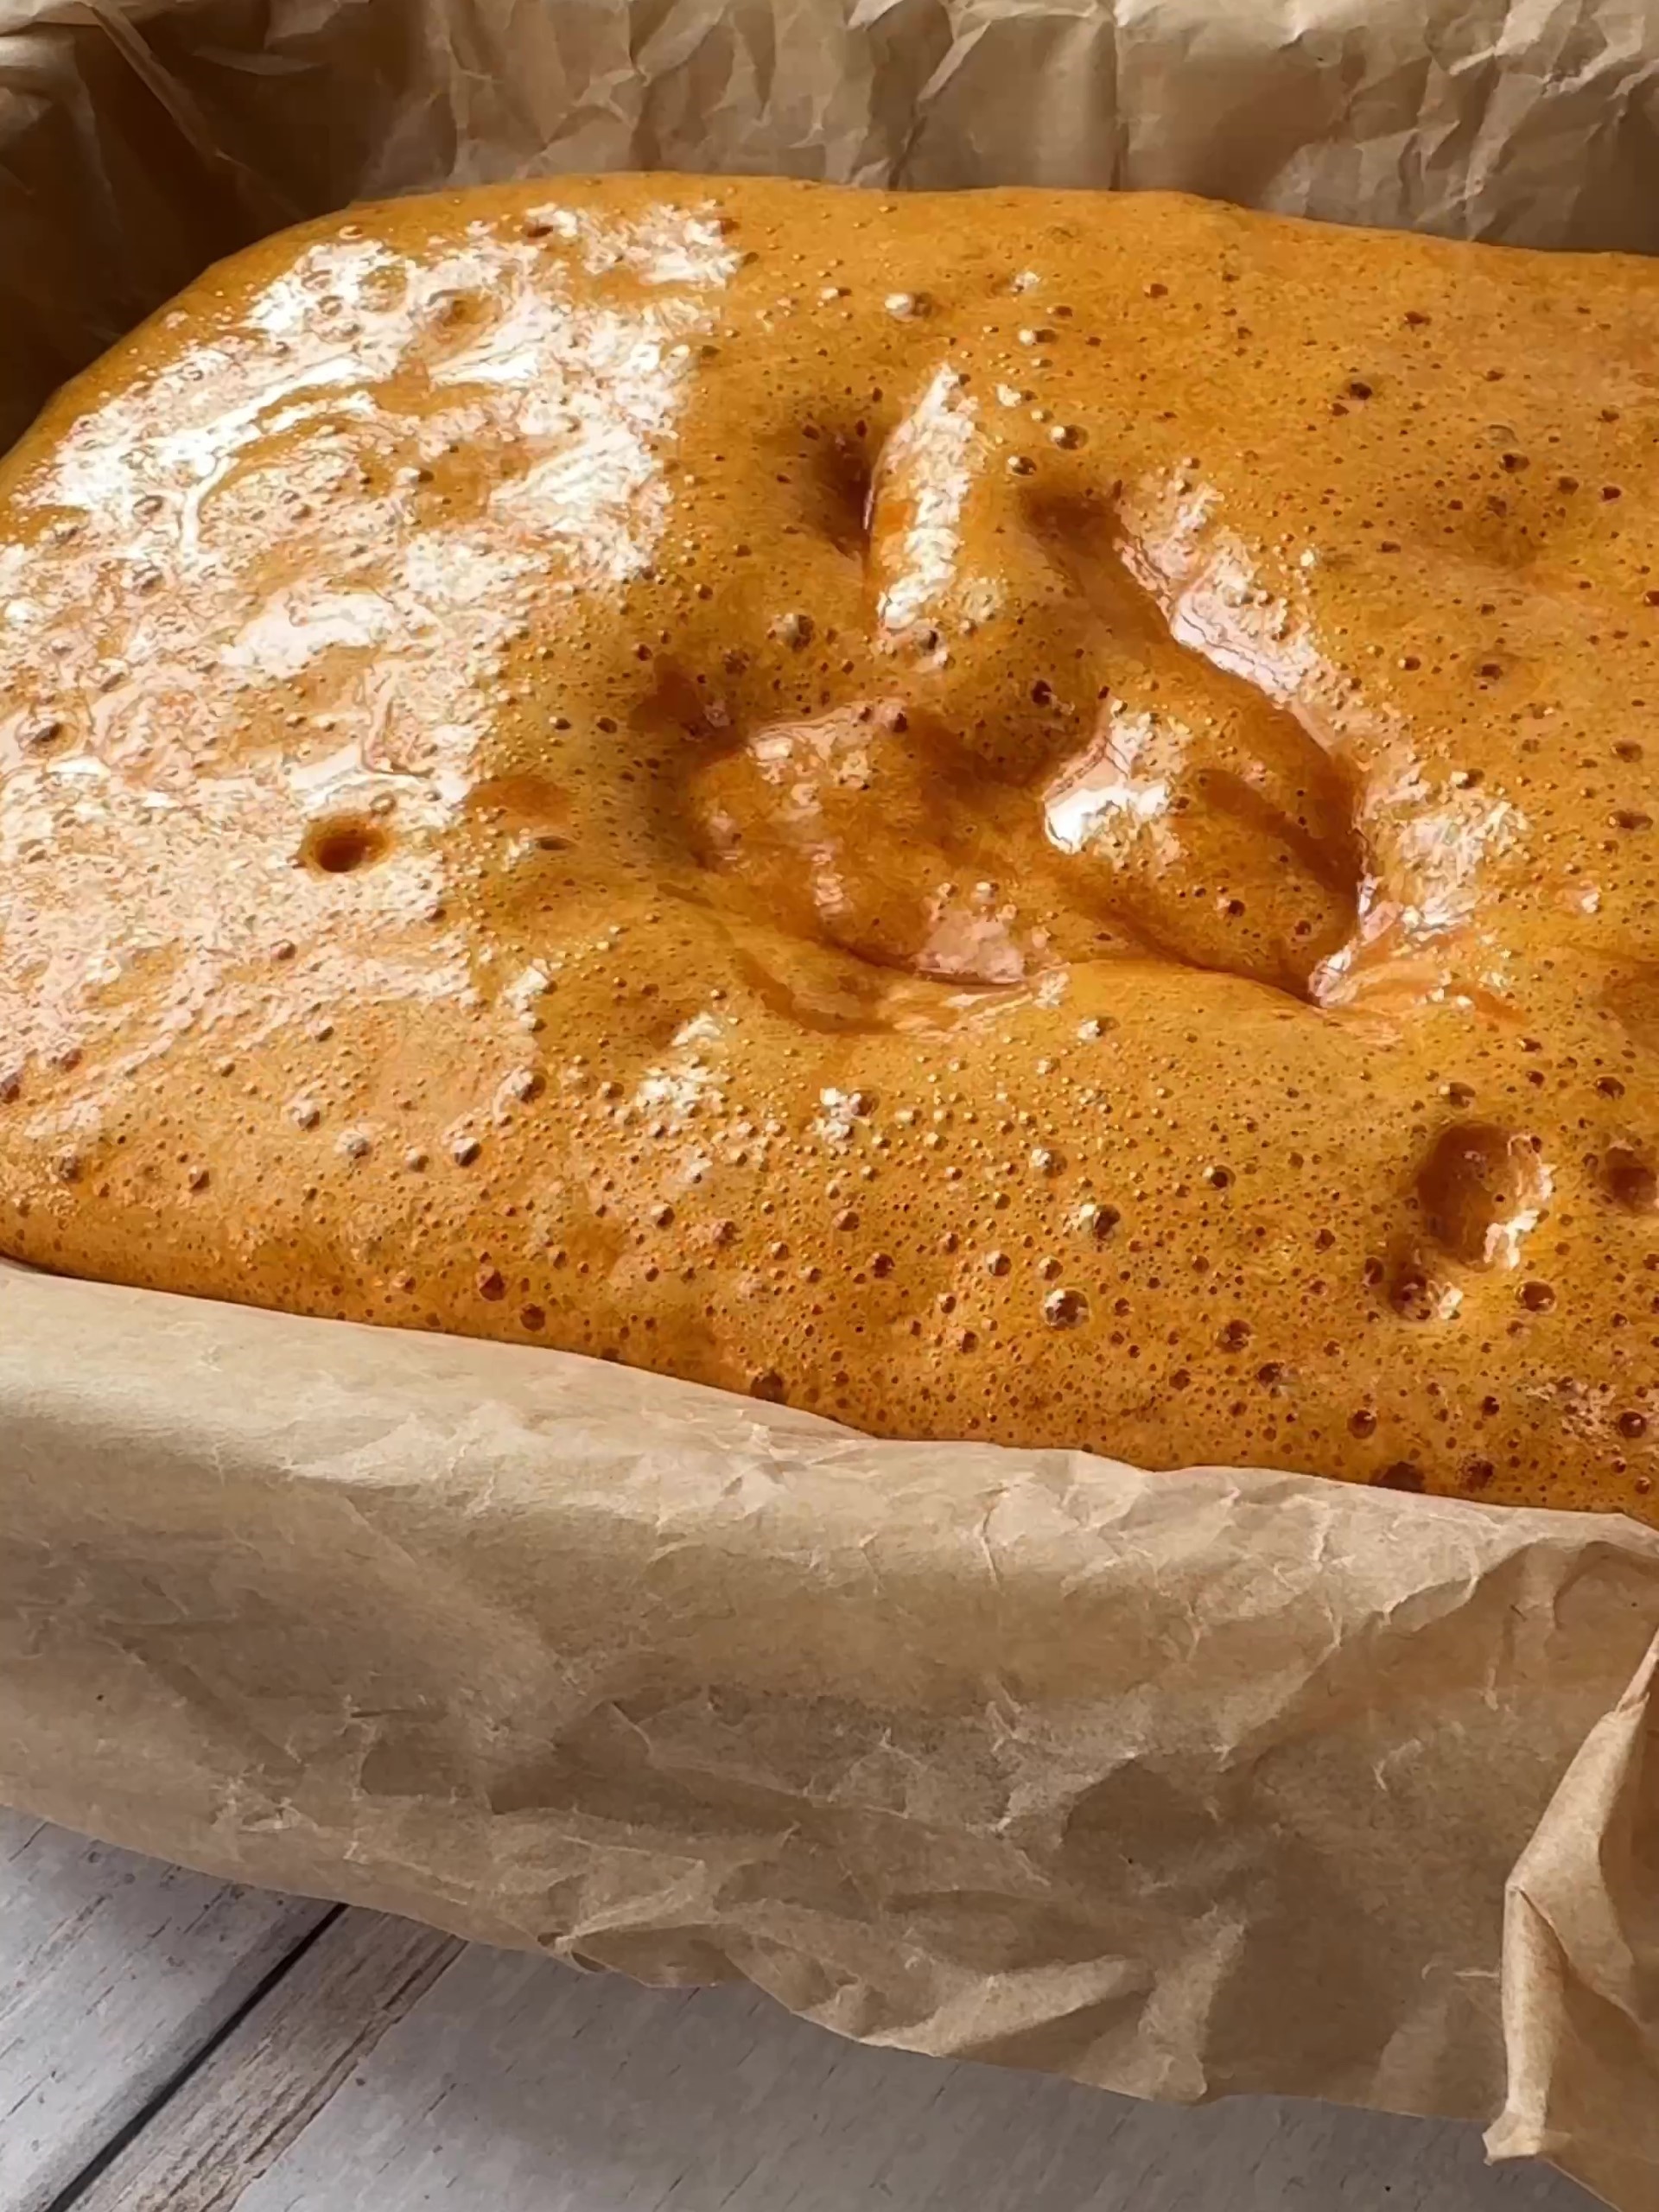
THREE: Pour into the prepared tin and leave for about 1 hour – or until set. Don’t touch it at all during this time as it will be VERY hot.
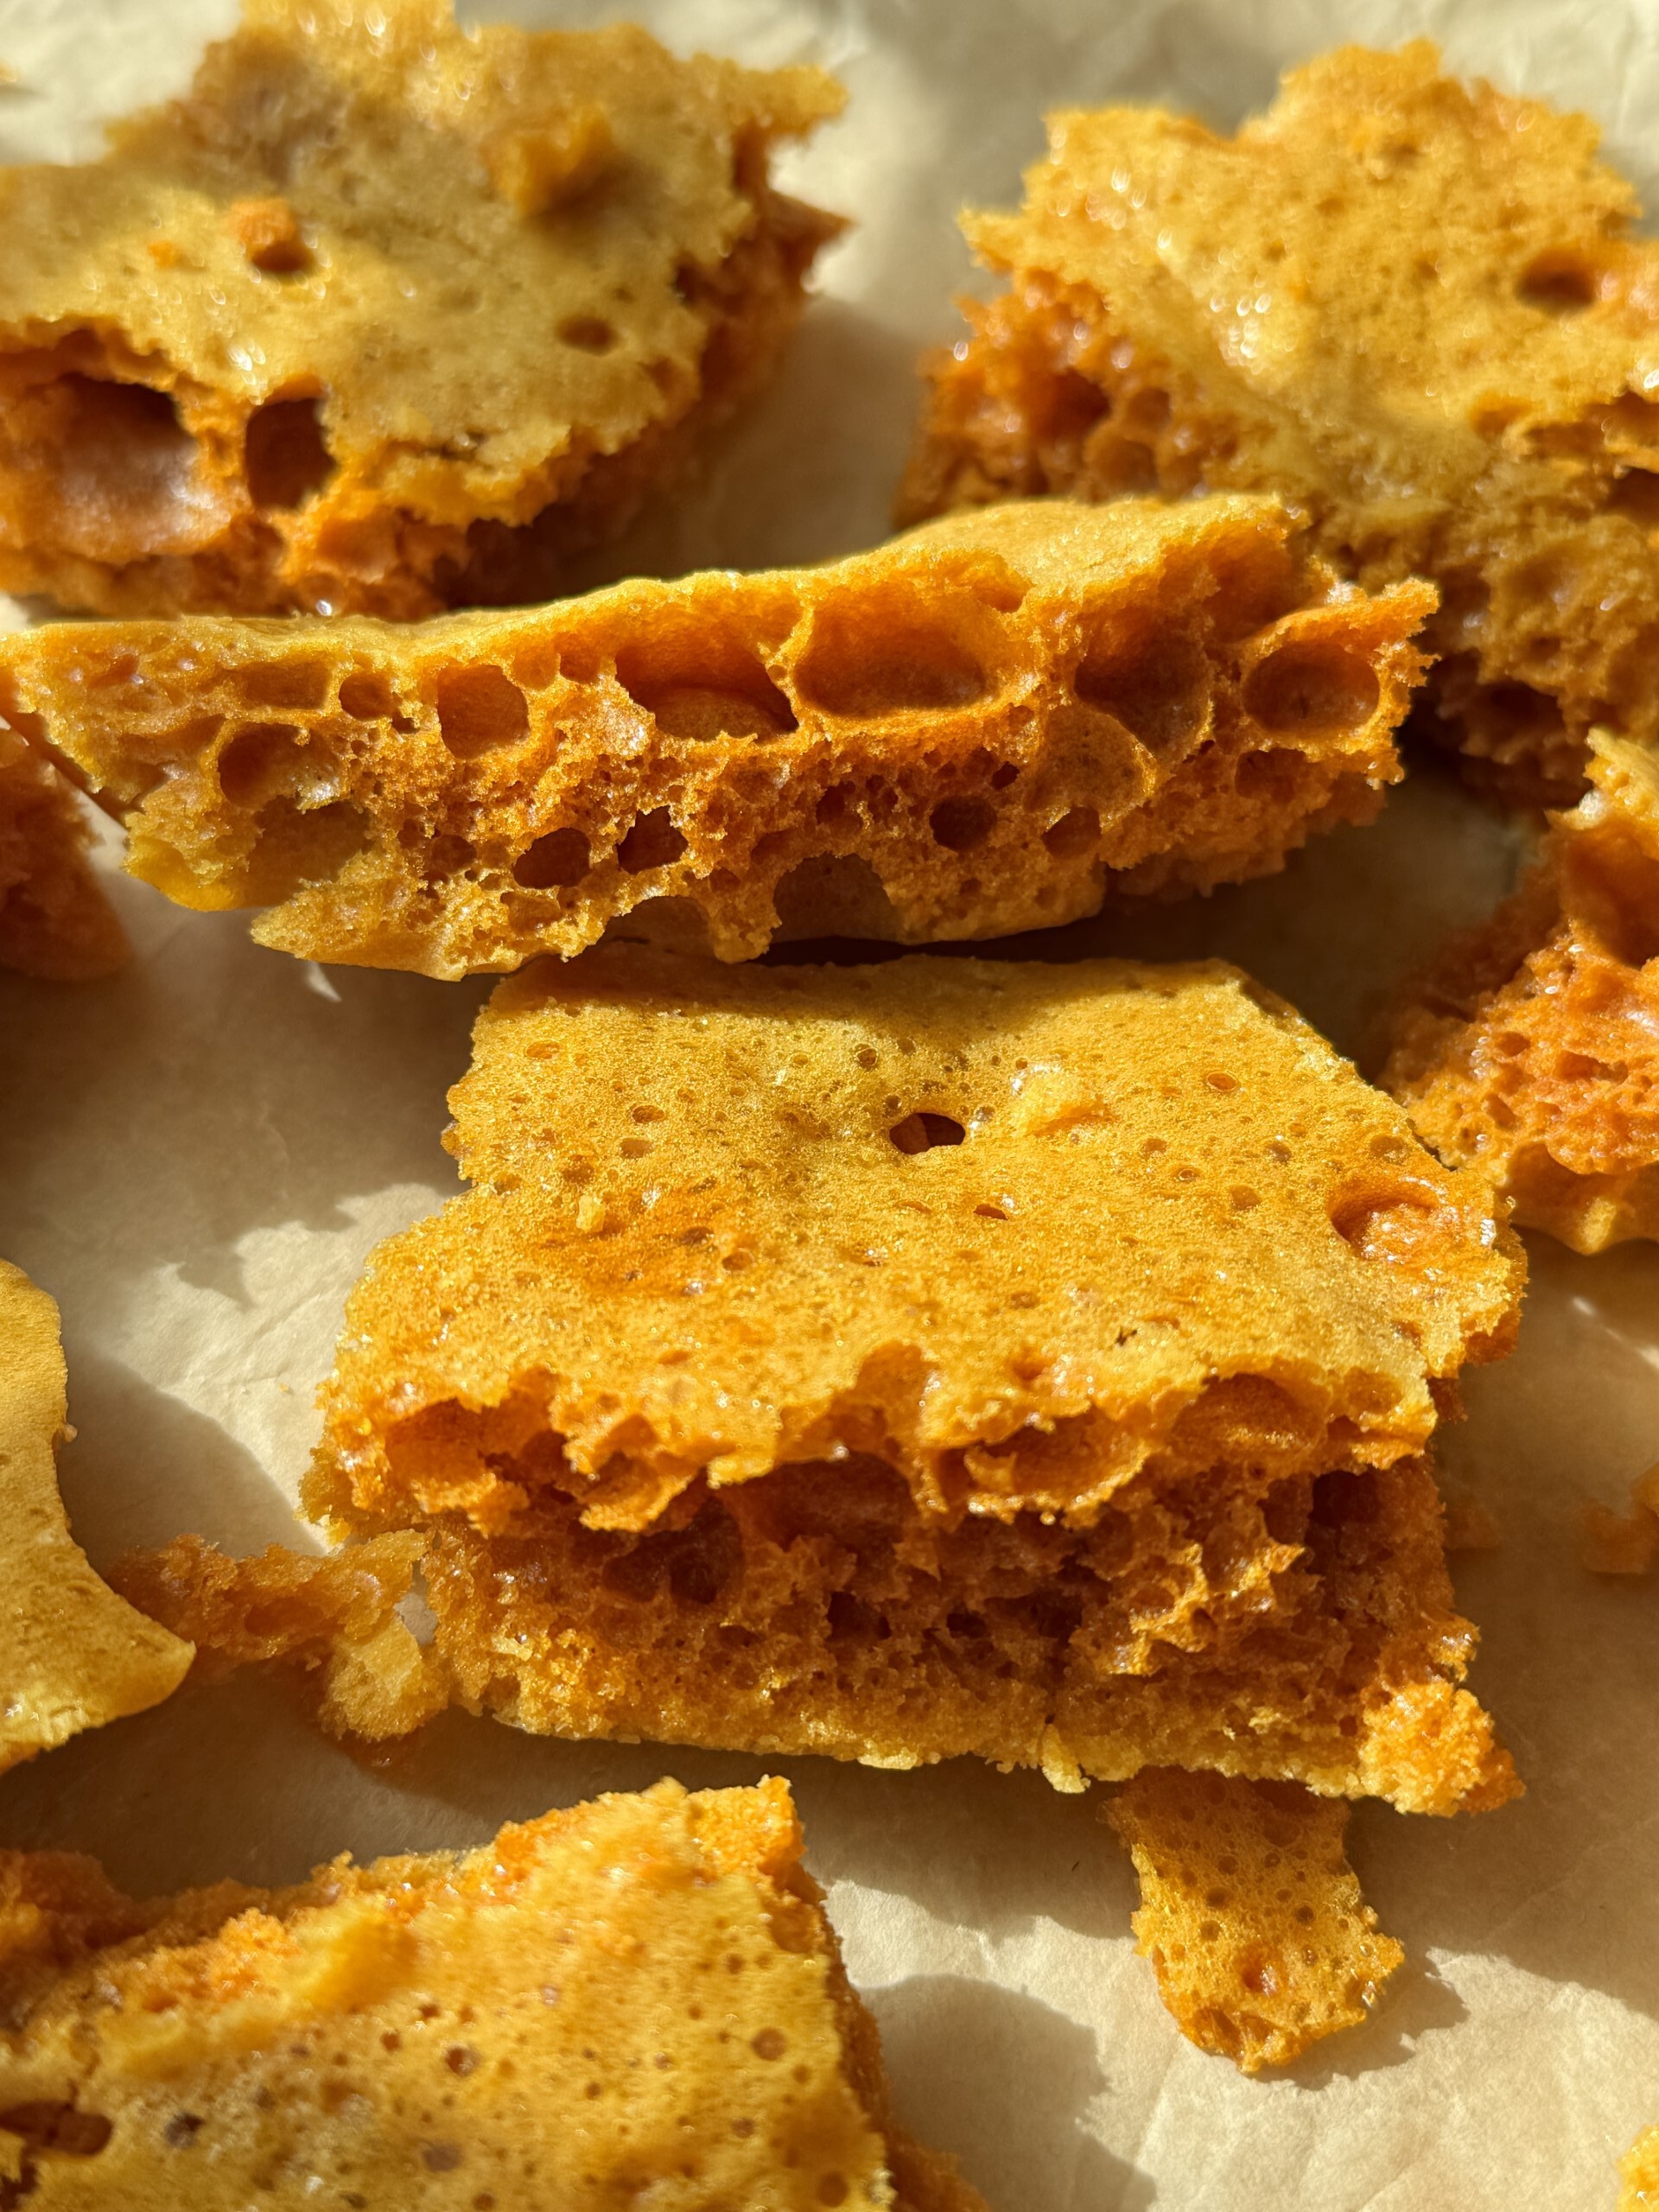
FOUR: Once the honeycomb has completely cooled, roughly chop into chunks.
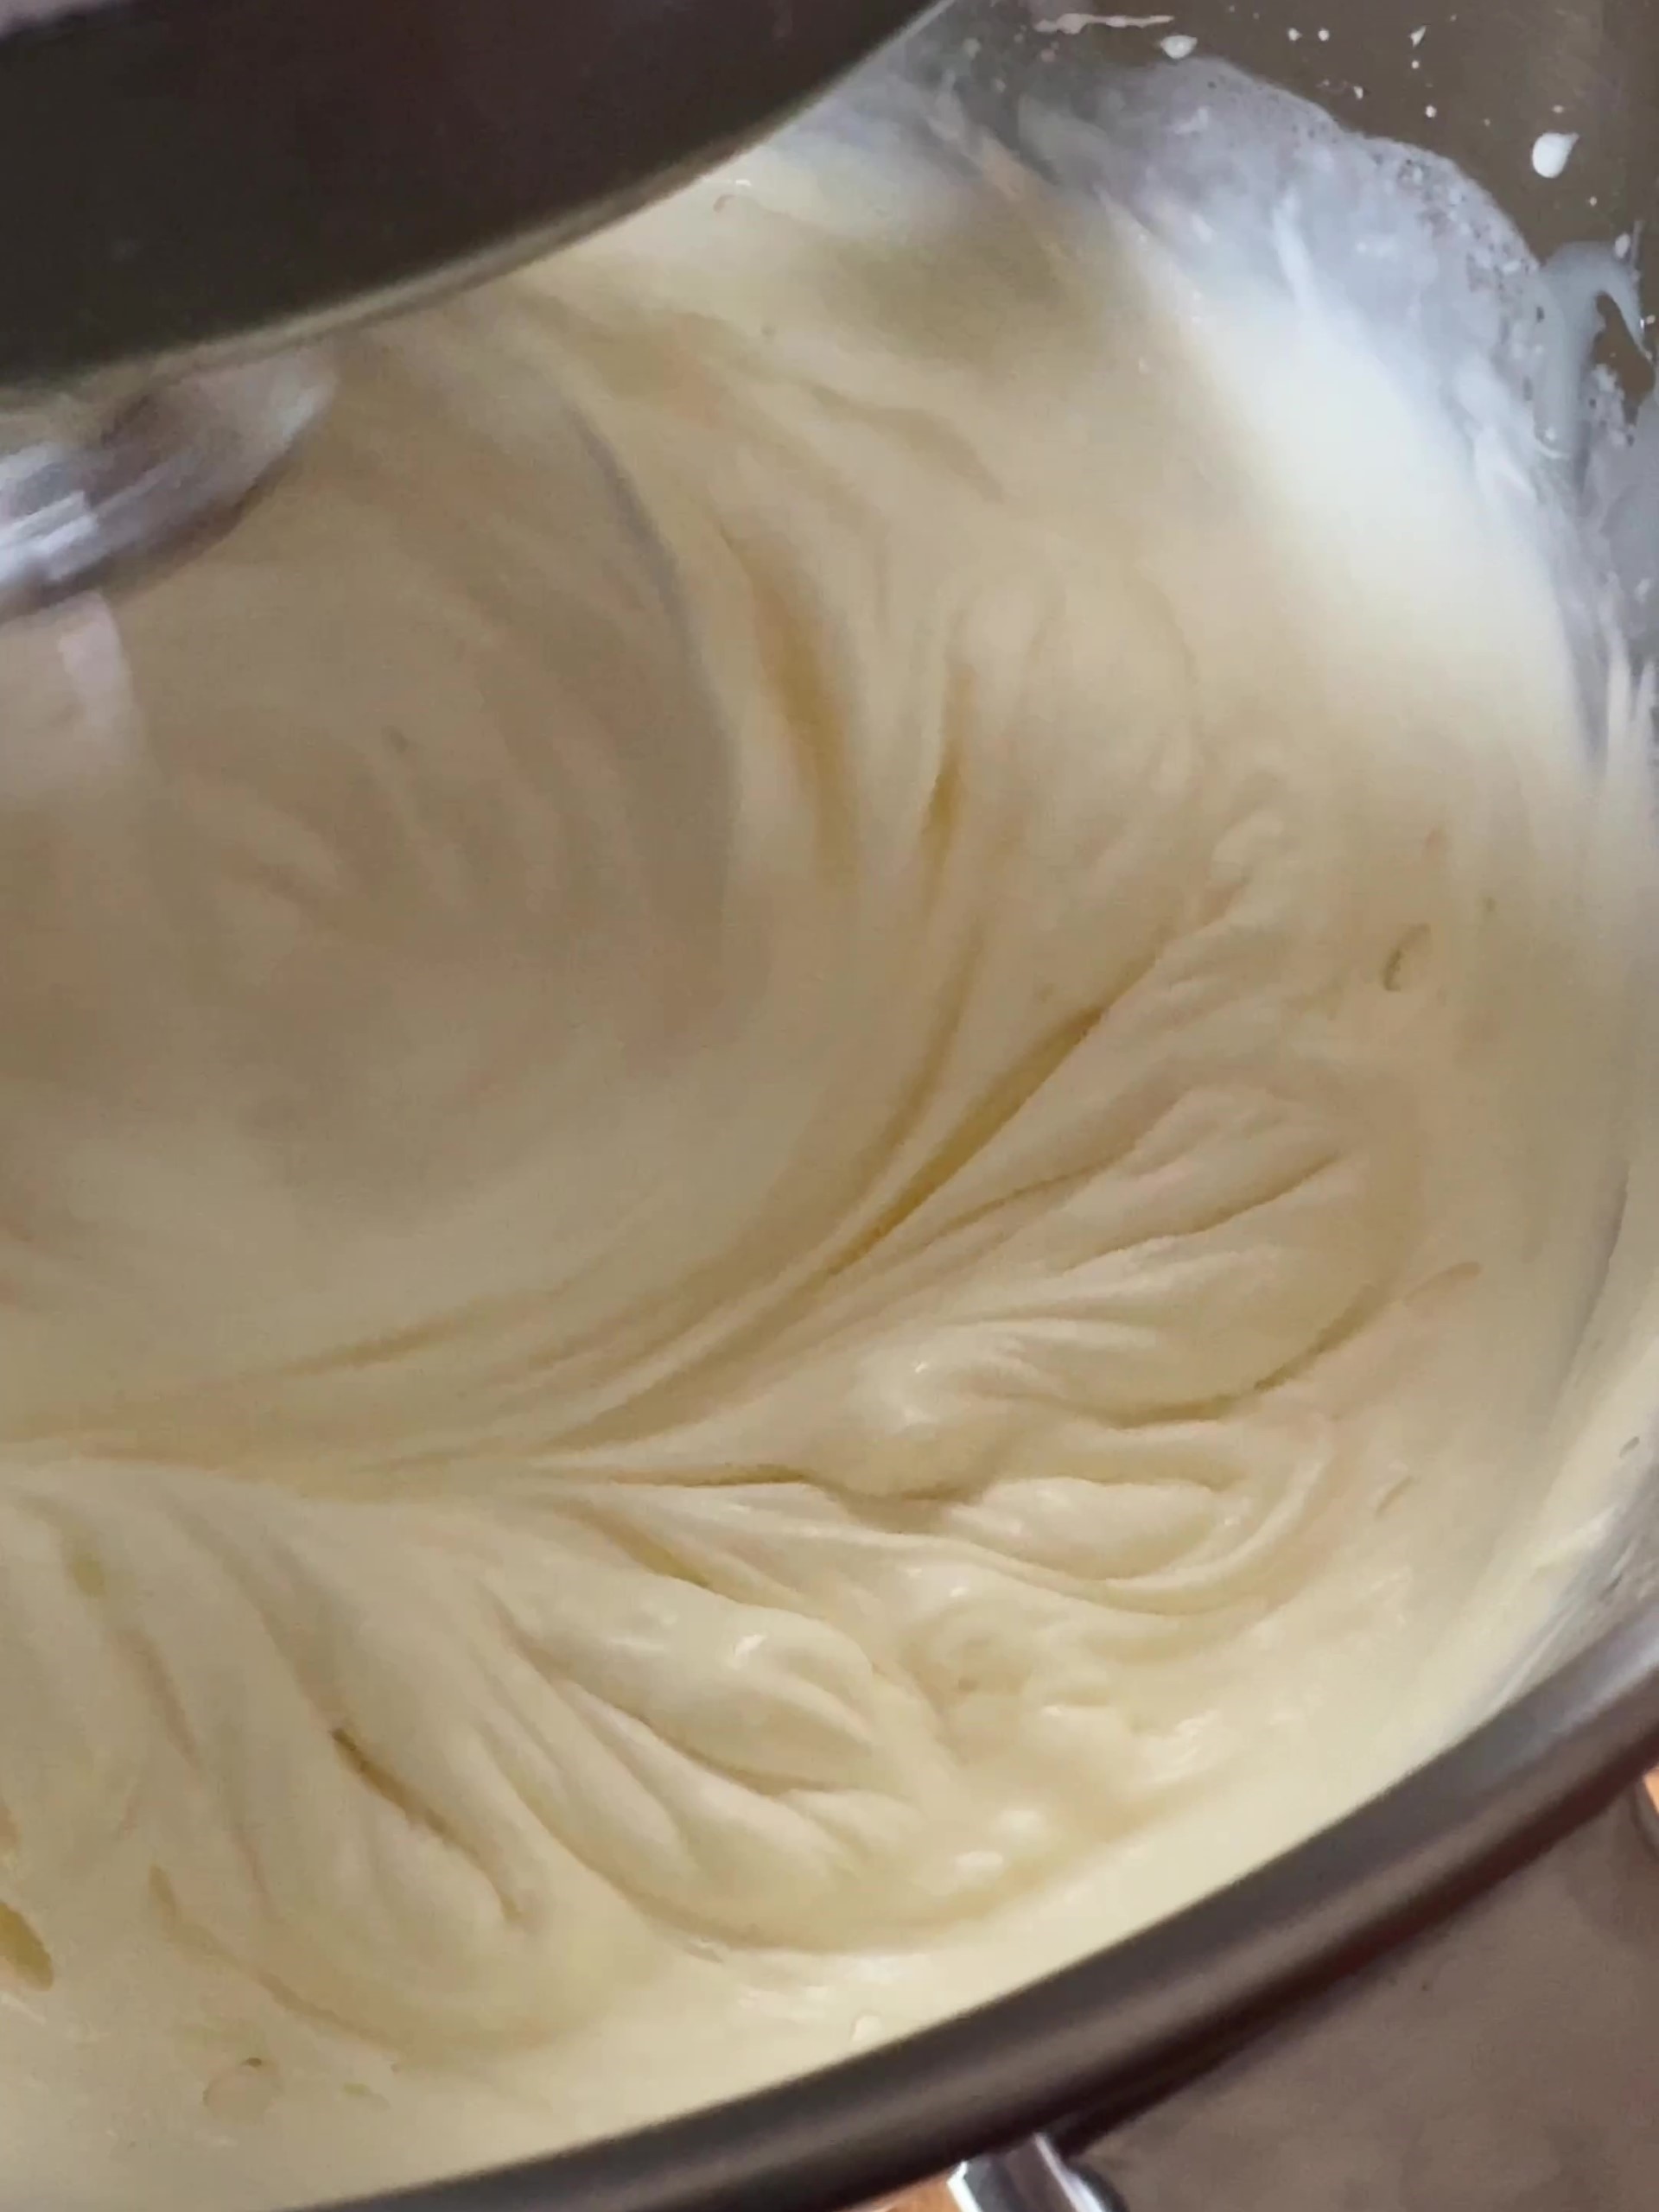
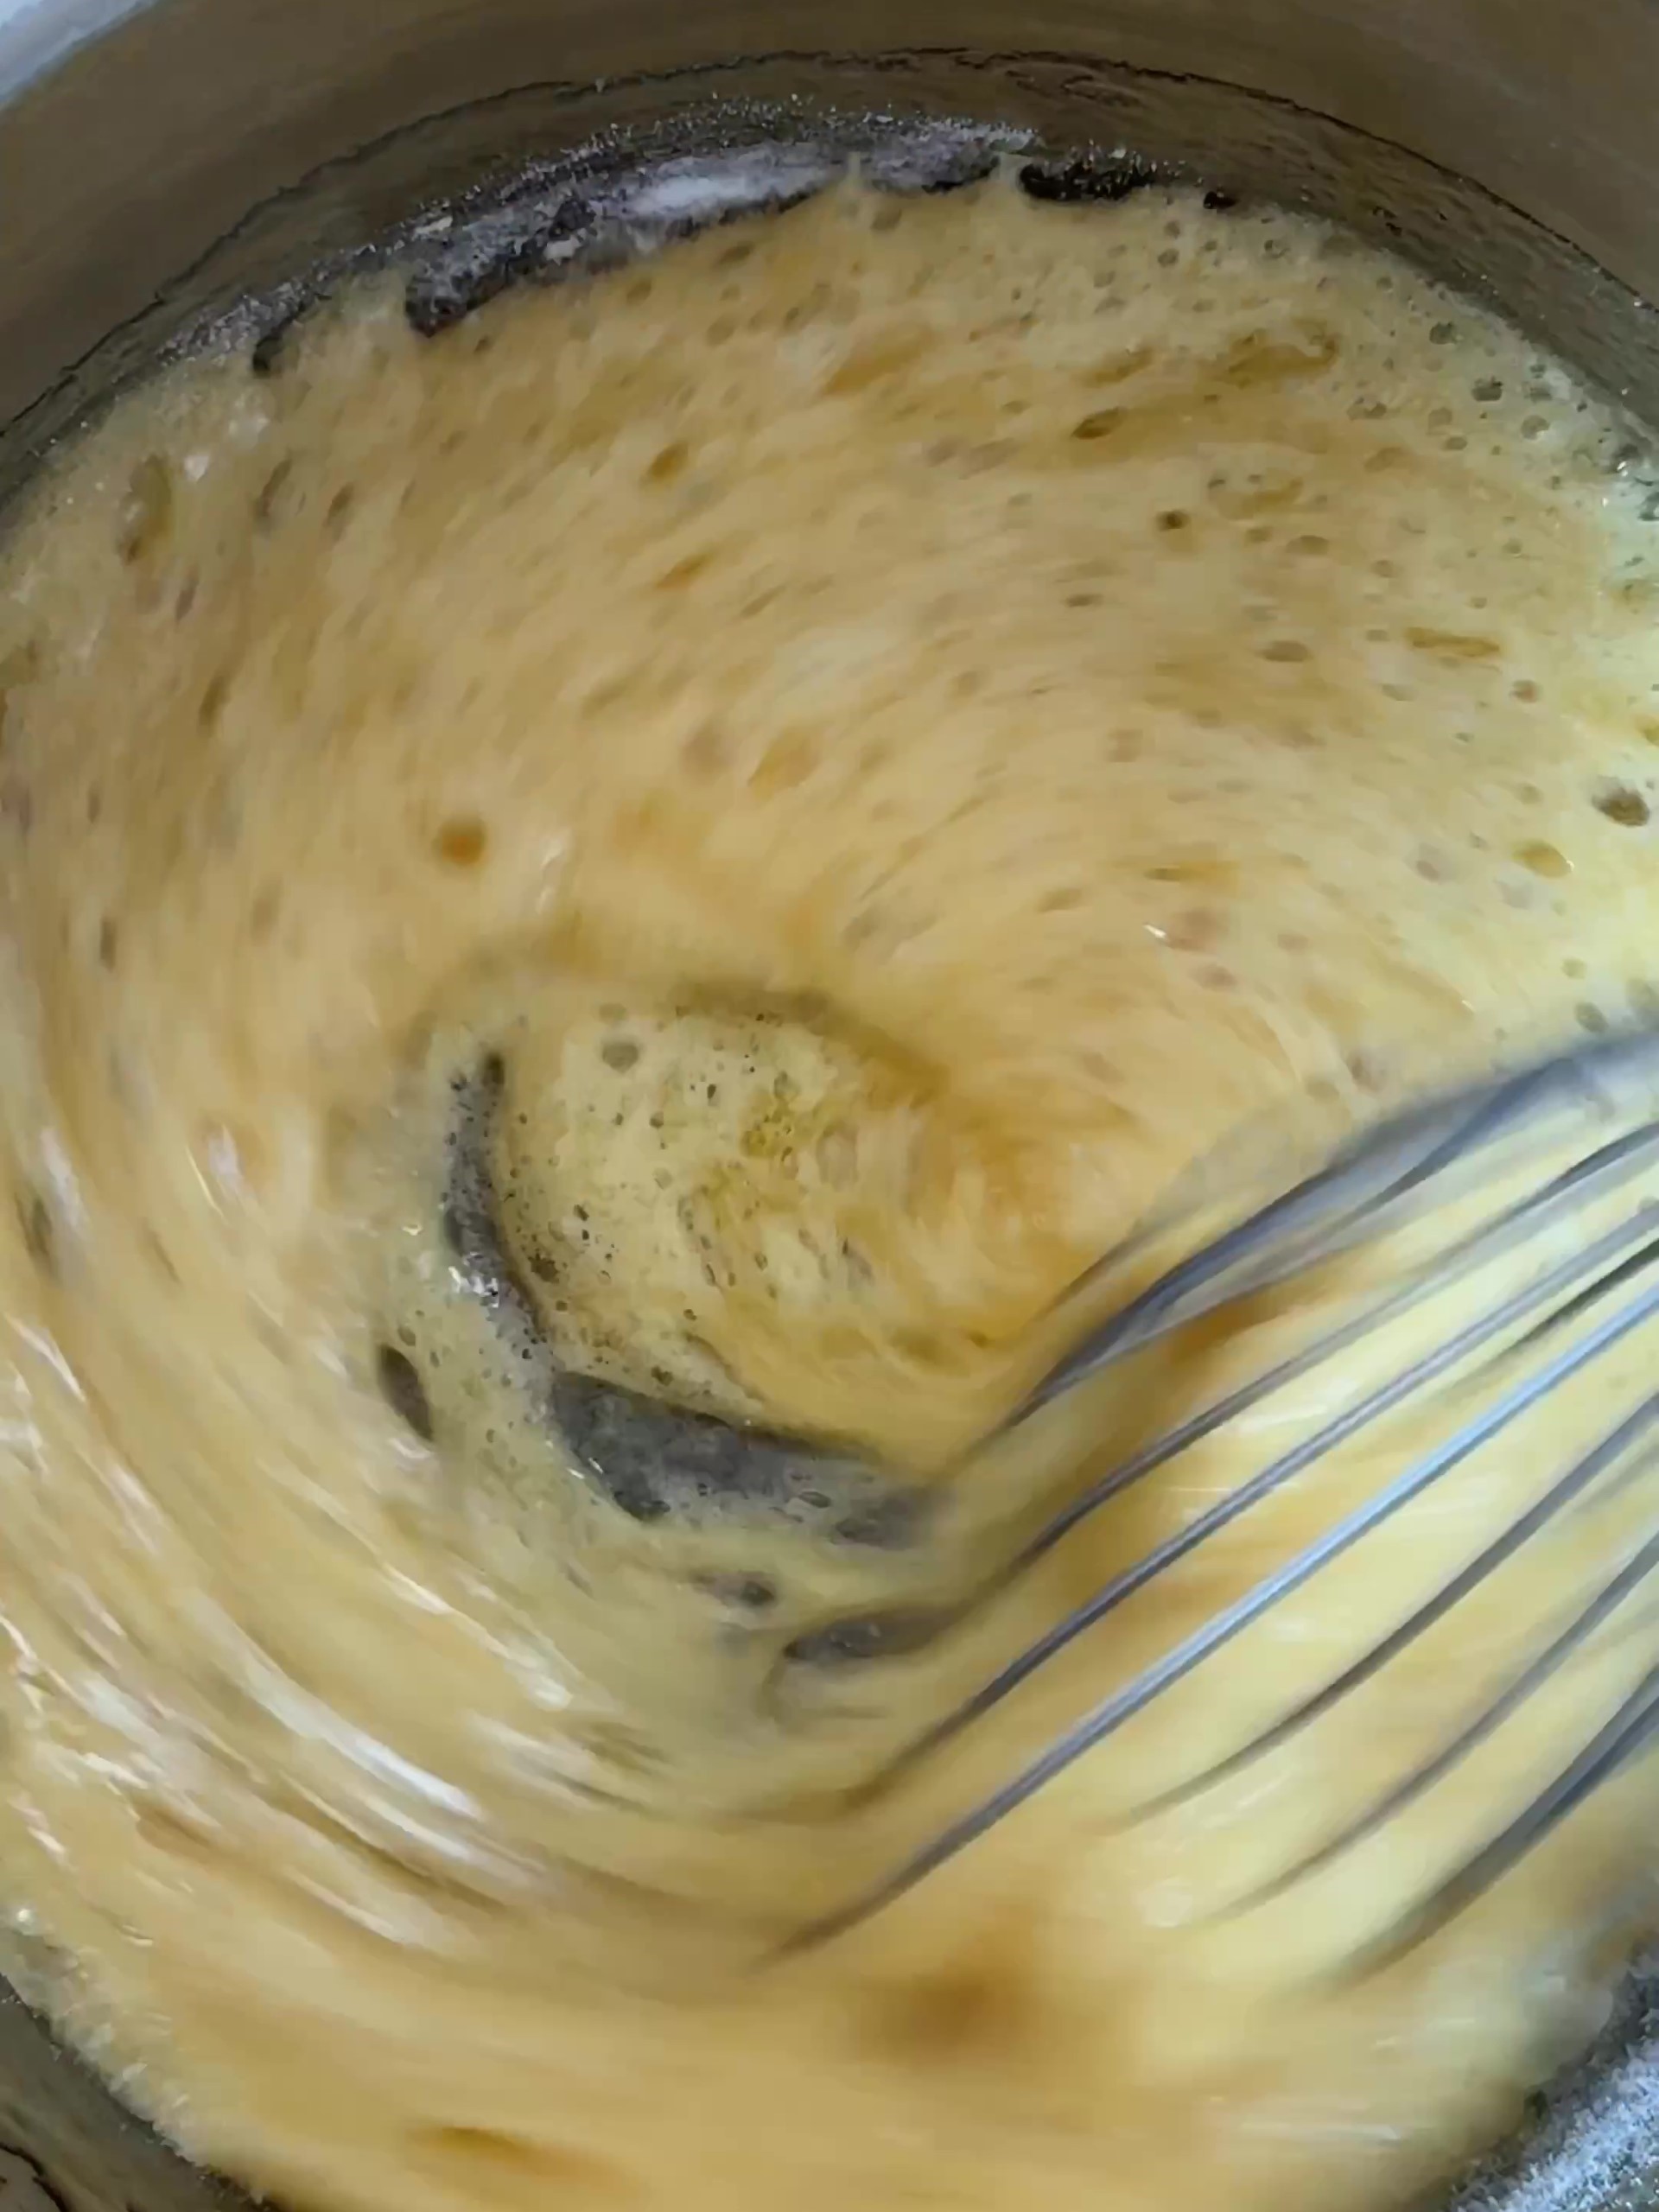
FIVE: For the ice cream – Pour the cream into a large mixing bowl and, using an electric whisk, whisk until you have soft peaks. Add the condensed milk and whisk again until thickened.
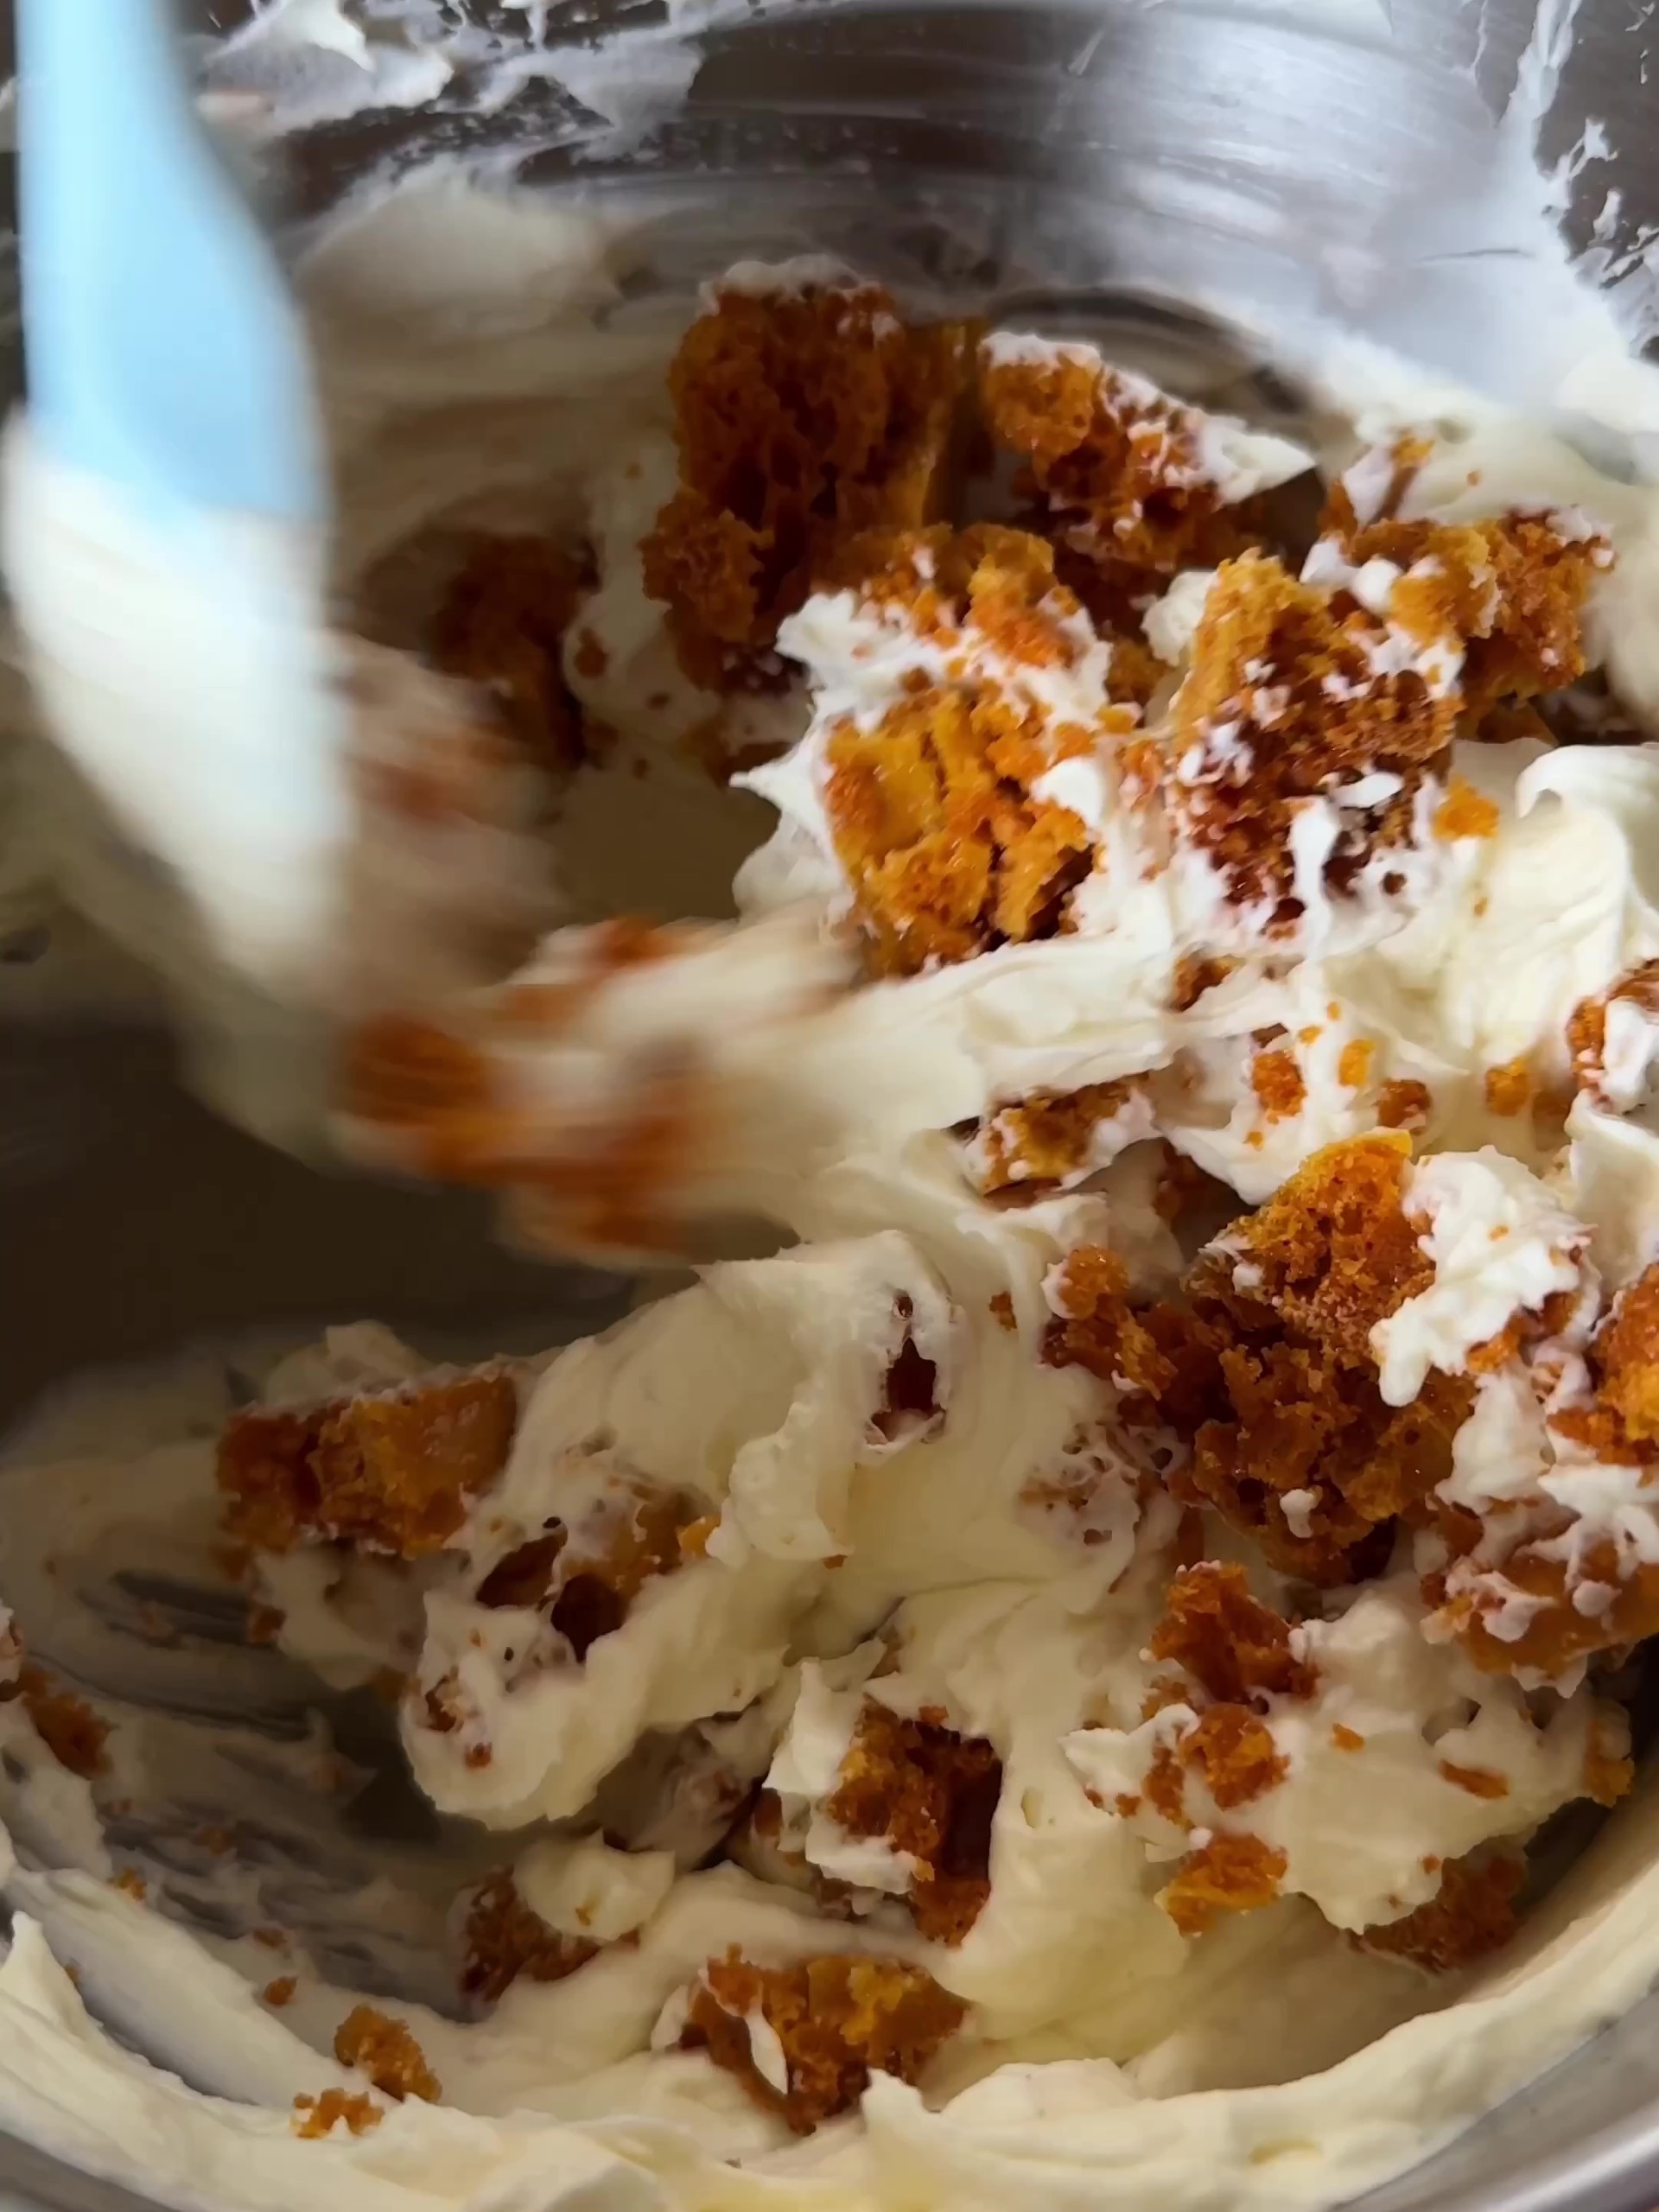
SIX: Fold in the homemade honeycomb chunks until evenly distributed throughout. Pour into the prepared tin and smooth over the top using a spatula. Cover with cling film and freeze for at least 6 hours.
Cooking Tips:
Be patient: you want to make sure you do gently boil the mixture for 3 minutes, I set a timer. If you don’t cook it enough the honeycomb will be soft and chewy. If you have a thermometer you will want it to reach 150c. Experience has taught me this is a gentle boil for 3 minutes.
Whipped cream: take care to whip the cream just to soft peaks as it will be whisked again once you add the condensed milk.
The perfect scoop: for easy scooping, dip an ice cream scoop in hot water, dry on a clean cloth, then glide across the top and scoop down. You should get perfectly round, creamy scoops.
Slice and serve: if you want a cheffy presentation, use the overhanging cling film to lift the ice cream out of the loaf tin. Set onto a board and, using a hot, dry knife, cut into slices. Place onto plates and drizzle over chocolate sauce or melted chocolate. An extra sprinkling of honeycomb, chopped crunchie bar or toasted nuts is a delicious final flourish.
Remove from the freezer before serving: it is important to remove the honeycomb ice cream from the freezer a few minutes before serving to give it time to soften a little and make it easier to scoop.

Frequently Asked Questions
Yes! This recipe is designed to be made without an ice cream maker. Simply whisk double cream with condensed milk to create a smooth, sweet and oh-so-creamy ice cream without ice crystals. You can swirl in all sorts of flavours and toppings too. No stirring every few hours – and definitely no ice cream maker required. This is the easiest ice cream you will ever make.
Honeycomb is a sweet, crunchy confection with a delicious toffee-ish flavour. You might have heard it called ‘cinder toffee’ or ‘hokey pokey’. In the UK, Australia and New Zealand, recipes tend to use golden syrup. However, in America, they often use honey which gives a more floral flavour. If you haven’t made your own honeycomb, you probably have tried a chocolate-coated version in the form of a crunchie chocolate bar.
Honeycomb ice cream keeps in the freezer in an airtight container for up to two months.
Some of my favourites:
On its own, it really doesn’t need much else!
With grated chocolate and chopped nuts on top – try toasted almonds or hazelnuts.
Sandwiched between two chocolate chunk cookies as an ice cream sandwich.
On top of fudgy chocolate brownies or chocolate chip cookie bars.
As an ice creams sundae with all the toppings.
With Apple and Blackberry Crumble.
Although I haven’t tried it, you could try using a vegan whippable cream and Carnation’s Vegan Condensed Milk.
Other recipes you might enjoy:
If you liked the sound of this Homemade Honeycomb Ice Cream, try my Baileys Ice Cream, No-Bake Biscoff Cheesecake or my Frozen Berries with Hot White Chocolate Sauce. My Melt-in-the-Middle Chocolate Puddings, Self Saucing Chocolate Pudding and Chocolate Chip Skillet Cookie all go well with honeycomb ice cream.

Easy Baking Recipes
Chocolate Chip Cookie Bars

Puddings
Banana Tiramisu
Puddings
Easy Homemade Pistachio Cream

Easy Baking Recipes
Moelleux au Chocolat (Melt in the Middle Chocolate Cake)
Made this recipe and loved it?
I would love love LOVE if you could leave a review in the comments… I love hearing what you thought, any changes you made, the stories behind what made you try my recipes. Also, if you share a photo on Instagram, please tag me @desertislanddishes, it makes my day to see you making my creations!

Homemade Honeycomb Ice Cream
Ingredients
- 2 tbsp golden syrup
- 140 g caster sugar
- 1 tsp bicarbonate of soda
- 600 ml double cream
- 1 x 397g tin condensed milk
Instructions
- Line a 23cm square baking tin or baking tray with non-stick baking paper. This is for the honeycomb which will be very hot, so make sure it is on a surface that can handle heat in case of any spills.
- Next, take a large pan (the honeycomb mix will froth up a lot so choose a pan larger than you think) and add the golden syrup. Place over a gentle heat for about 1 minute – or until the syrup becomes very runny.
- Add the sugar and bring to the boil, swirling the pan to stop it from burning (don’t stir). Once boiling, continue to cook for 3 minutes, swirling often to prevent it from burning. Do time it and don’t guess.
- Remove from the heat and shoot in the bicarbonate of soda. Stir quickly and confidently – you don’t want to overmix it but you do want it to be completely dissolved. Take care, it will really froth up.
- Pour into the prepared tin/onto the prepared baking sheet and leave for about 1 hour – or until set. Don’t touch it at all during this time as it will be VERY hot. See the tips for how to clean your pan immediately!
- Once the honeycomb has completely cooled, roughly chop into small-ish pieces.
- Next, line a 900g / 2lb loaf tin with cling film, ensuring you have enough overhanging the sides. Set aside.
- Pour the cream into a large mixing bowl and, using an electric whisk, whisk until you have soft peaks.
- Add the condensed milk and whisk again until thickened.
- Fold in the homemade honeycomb chunks until evenly distributed throughout.
- Pour into the prepared tin and smooth over the top using a spatula. Cover with cling film and freeze for at least 6 hours.
- Remove from the freezer 5 minutes before serving. Enjoy!
Notes
Nutrition
Nutrition information is automatically calculated, so should only be used as an approximation.


In NZ, they call honeycomb hokey pokey. Hokey Pokey ice cream is iconic there. The cream is different from what we get here in Canada, naturally sweeter. It’s a beautiful thing!
This ice cream is so so so delicious. Perfect recipe. it tastes better than store bought.
Amazing! Will be making all the time now
This ice cream is sublime. I keep making it for special occasions. THANK YOU!!!
Oh I’m so pleased! Margie x
Is the condensed milk sweetened?
Hi! Yes, condensed milk is evaporated milk with added sugar. Sweetened evaporated milk is condensed milk, but there’s no such thing as unsweetened condensed milk — that’s just evaporated milk. Does that make sense? Hope it helps! Margie