
This post may contain affiliate links. Please see our disclosure policy.
At first, you may think these chocolate chipless cookies are just cookies without chocolate chips – which, yes, they are – but they are so much more. Without the chocolate and with the addition of nutty brown butter, you can really taste the buttery, caramel flavor and the vanilla flavor, and it gives such a delicious, chewy, soft center with crisp golden edges. You may also know these as ‘boneless cookies,’ but whatever the name, they are so good.

Table of Contents
If you’ve ever run out of chocolate chips, don’t love chocolate, or whatever it may be, these are perfect. But I’d encourage you to try these even if that’s not the case, as they are just so good. Dunking them in hot chocolate is also a very good idea.
Below you’ll find a quick recipe, step-by-step instructions, texture tips, and troubleshooting – a complete guide to these ingenious chocolate-free cookies.
Why you will love this recipe
- They focus on deep caramel-vanilla flavor, letting butter and brown sugar shine.
- Easy to prep ahead – the dough can rest overnight or be baked immediately.
- They make the perfect texture: chewy, crispy, soft center, and crisp edges.
- Perfect for chocolate-free diets, those with allergies, or when you just want something simple and satisfying.
Ingredients
- Soft light brown sugar – The soft sugar creates the best texture versus a demerara/turbinado sugar.
- Superfine sugar – Known as caster sugar in the UK. The fineness helps with the texture.
- Vanilla extract – I actually like to use vanilla bean paste, but extract works, of course. Just try to find a good quality one, as vanilla is a key flavor here.
- All-purpose flour (plain flour) – This provides the cookies with structure and lift.
Substitutions and variations
Brown butter – Browning the butter is an additional step that gives these cookies a delicious nutty flavor. However, if you are short on time, you can just use regular softened butter.
The sugar – You can swap the superfine (caster) sugar for granulated sugar if that is what you have.
Mix-ins – These are chocolate chipless cookies, but if you do want to add anything like nuts or chocolate, this is a great base recipe. Just add in around 1 1/4 cups (200 g) of your mix-in of choice.
How to make chewy chocolate chipless cookies
Here’s a quick visual guide — the full recipe with exact measurements is below.

ONE: First, make the brown butter. For a complete guide on brown butter with images, use the step-by-step guide in my chocolate chunk cookie recipe. The recipe card below has the full written instructions.

TWO: In a large mixing bowl, add the brown butter, superfine (caster) sugar, and soft light brown sugar and beat together.

THREE: Add the egg and vanilla extract and mix again until combined.

FOUR: Add the plain flour, baking soda (bicarbonate of soda) and salt. Mix until you have a smooth dough. Cover and chill in the fridge for at least 30 minutes

FIVE: Use an ice cream scoop or a spoon to scoop the dough into about 10-12 balls. Bake for 8-10 minutes in a preheated 375°F (190°C/170°C fan) oven, until just set. The edges will just be set, and the middle will still look very soft – they harden as they cool, so don’t overcook them. Sprinkle with flaky salt while still hot.

SIX: As soon as the cookies come out of the oven, take a large cookie cutter or a glass and gently swirl it around each cookie to create the perfect circle shape. Whatever you’re using must be larger than the cookie, or you get weird edges, but this gives the cookies a lovely shape.
Troubleshooting
| Problem | Cause | Fix |
|---|---|---|
| Too flat | Butter is too warm | Chill dough 1 hour |
| Too cakey | Overmixed the dough | Mix just until flour disappears |
| Grainy texture | Sugar is not dissolved | Beat butter and sugar longer |
| Greasy | Too little flour | Add 1-2 tbsp (10-15 g) extra flour |
| Hard cookies | Overbaked | Keep a close eye on them in the oven; remove when edges are just set but middle still soft |
| Sticky dough | Humid kitchen | Chill 30 minutes |
| Burnt bottoms | Thin tray/hot oven base | Use heavy-bottomed baking sheet or cook in batches in the middle of the oven |
| Pale color | Low oven temp | Bake longer – all ovens vary |
Tips from Margie’s kitchen
- Flour and mixing: don’t overmix once you add the dry ingredients to the wet. Overworking = toughness, when we want soft and chewy.
- Chill out: Don’t skip the chilling step! Even just 30 minutes makes a difference. Chilling helps solidify the butter, preventing the cookies from spreading too much in the oven. The result is thicker, chewier cookies with more even browning and better overall texture. It also gives the flour time to hydrate, enhancing the flavor. Short on time? Try making chocolate chip cookie bars instead.
- Give them space: Make sure there’s plenty of room between each dough ball on the baking sheet. Cookies spread as they bake.
- Cooling matters: Allow your cookies to cool for at least 15 minutes before digging in. This gives them time to firm up slightly, locking in that perfect chewy texture.
Frequently asked questions
Yes, you can do that, but you won’t get nearly as good a result. You only need to chill for 30 minutes, so I truly advise it, and your cookie will be way better. But if you really don’t have time, skip this and just bake at a hotter temperature like 390°F (200°C/180°C fan), as the higher heat will set the edges quickly to stop it spreading too much.
I highly recommend it here, as the brown butter and vanilla are the dominant flavors, but if you are short on time, you can just use softened butter. It won’t have a caramel flavor but will still be delicious.
The brown butter can be made up to 2 weeks ahead and kept chilled in the fridge (remember to bring to a softened room temperature before making the cookies).
You can make the cookie dough up to 3 days in advance, then cover and chill in the fridge. Either keep it in the bowl and chill or chill after you have shaped it into balls.
Yes, you can bake these chocolate chipless cookies from frozen. Lay them on a baking sheet and bake as usual at 375°F (190°C/170°C fan). Cook for 13-15 minutes, keeping an eye on them. You want them golden and crisp on the edges but soft and puffy in the middle.
Other recipes you might enjoy
I have a whole host of cookie recipes on my site, similar to these chocolate chipless ones. Try my chocolate chunk cookies, brookies (brownie and cookies in one!), or my tiramisu cookies. You might also want to try my thick hot chocolate or salted caramel cheesecake.

Puddings
Self Saucing Chocolate Pudding

Easy Dessert Recipes
Apple and Blackberry Crumble
Puddings
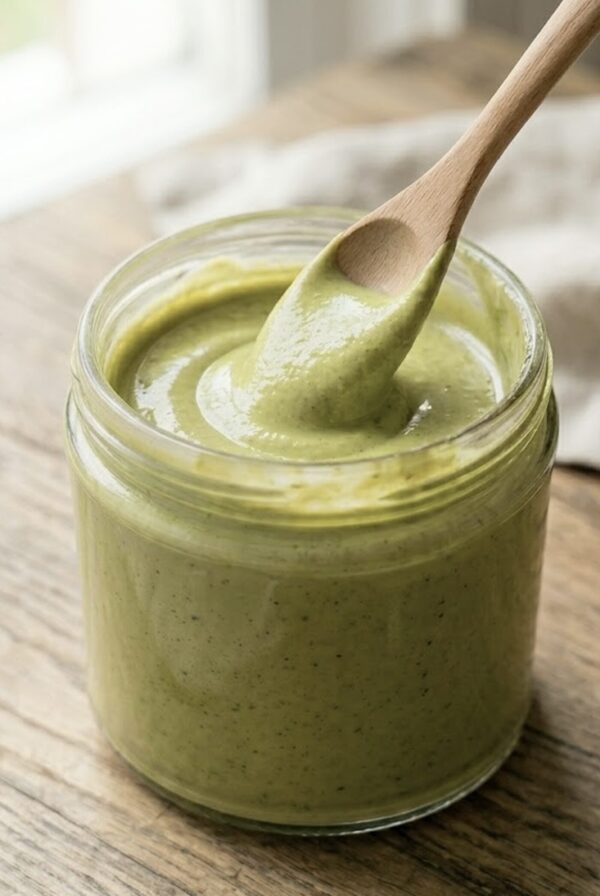
Easy Homemade Pistachio Cream

Easy Baking Recipes
Dark Chocolate and White Chocolate Brownies
If you tried these Chocolate Chipless Cookies or any other recipe on the site, please do leave a rating or comment and let us know how it went!

Soft and Chewy Chocolate Chipless Cookies
Ingredients
- 4 oz salted butter, about 1/2 cup (1 stick)
- 3.5 oz soft light brown sugar, about 1/2 cup, packed
- 1.75 oz superfine sugar (caster sugar), about 1/4 cup
- 1 large egg
- 2 tsp vanilla extract
- 5.5 oz all-purpose flour (plain flour), about 1 1/4 cups
- 1/2 tsp baking soda (bicarbonate of soda)
- 1/4 tsp fine sea salt
- Flaky sea salt, for topping
Instructions
- Make the brown butter: Pop the diced butter into a medium-sized non-stick saucepan and set over medium heat. Stir gently until completely melted. Increase the heat to medium and allow the butter to bubble, stirring often. It will bubble and spit – don’t panic, this is normal (just take care!).
- Continue to cook the butter, stirring to ensure it cooks evenly, until the crackling noises fade and the bubbles subside. At this point, you should see a foam appear on the surface, and the color will change from golden-yellow to light brown to deep amber brown. This can take anywhere between 7-10 minutes, depending on the size of your pan and how high your heat is. Watch the pan closely as it takes just seconds to go from brown to burnt.
- As soon as brown flecks start to appear and you start to smell a gorgeous nutty aroma, remove from the heat. Quickly, but carefully, pour into a medium-sized heatproof bowl. This stops it cooking any further. Leave to cool slightly. It doesn’t need to be room temperature but shouldn’t be scorching hot. You can make the brown butter up to 2 weeks in advance and keep it chilled in your fridge. Allow it to come to a softened room temperature before making the cookies.
- In a large mixing bowl, add the brown butter, superfine sugar, and soft light brown sugar. Using an electric mixer, beat together. You can use a wooden spoon too.
- Add the egg and vanilla extract and mix again until combined.
- Add the flour, baking soda, and salt. Mix until you have a smooth dough.
- Cover and chill in the fridge for at least 30 minutes – ideally overnight. I know it is tricky, but I promise it does make a difference and will be worth the wait! You can freeze at this point too.
- When you are ready to bake the cookies, preheat the oven to 375°F (190°C/170°C fan). Line a couple of baking sheets with parchment paper and set aside.
- Use an ice cream scoop or a spoon to scoop the dough into about 10-12 balls. Place on lined baking sheets; they do spread, so I found doing 4 on a sheet worked best.
- Bake for 8-10 minutes until just set. The edges will just be set, and the middle will still look very soft – they harden as they cool, so don’t overcook them. Sprinkle with flaky salt while still hot.
- As soon as the cookies come out of the oven, take a large cookie cutter or a glass and gently swirl it around each cookie to create the perfect circle shape. Whatever you’re using must be larger than the cookie or you get weird edges but this gives the cookies a lovely shape.
Video
Notes
Make-ahead and storage
To store: The baked cookies will last for up to a week in an airtight container – although they are best the day they are made. To reheat: If, like me, you love a warm cookie, reheat in the microwave in 20-second bursts until warm. Or pop in a preheated air fryer at 340°F (170°C) for 3 minutes or so. To freeze: This cookie dough freezes well for up to 3 months. I recommend freezing the individual balls so you can take them out and bake as you need from frozen (bake for 13-16 minutes). Alternatively, shape the chilled dough into a log before freezing. You can then defrost in the fridge before slicing and baking. Make ahead: The brown butter can be made up to 2 weeks ahead and kept chilled in the fridge (remember to bring to a softened room temperature before making the cookies). You can make the cookie dough up to 3 days in advance, then cover and chill in the fridge. You can either do this and keep it in the bowl or after you have shaped it into balls. You can also freeze in advance; I recommend freezing in individual balls and then bake from frozen. Just add a few minutes onto the baking time.More quick tips
Bake what you need: You don’t have to bake all the cookies at once. I sometimes bake a couple of cookies at a time so I can enjoy them at their best. Plus, the dough will only improve as it chills in the fridge. If you are keeping it for longer than 3 days, shape into balls and freeze. Then bake from frozen for 13-16 minutes, as they will need longer than if they were just fridge-cold. Chilling: I know it is tempting to skip this, but these chocolate chipless cookies will be better for having time to chill. It helps solidify the butter to prevent them from spreading too much in the oven. This gives a thicker, chewier cookie with better texture and more even browning. It also helps hydrate the flour, which enhances the flavor.Nutrition
Nutrition information is automatically calculated, so should only be used as an approximation.


These chocolate chipless cookies are incredible – they are chewy, buttery with a caramel flavour. Finished with flakey salt, they are my new obsession.