- Recipes
Chicken Liver Paté Inspired By Sophie Michell

Chicken Liver Paté Inspired By Sophie Michell
5 Stars 4 Stars 3 Stars 2 Stars 1 Star
No reviews
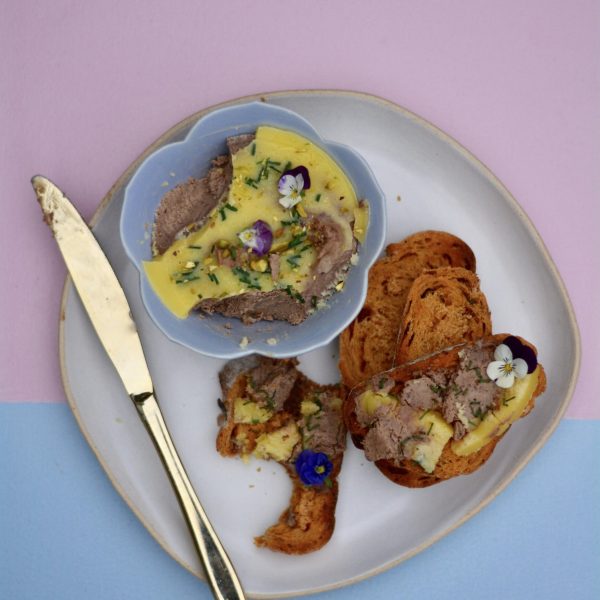
Sophie chose chicken liver paté as the starter for her final meal before being cast off to the desert island. And while of course, it is nothing to do with me, I do think she chose a cracker of a dish. I love chicken liver paté and it does make the most wonderful starter. Knock it up for a dinner party the day before and you can relax in the knowledge that at least some of your work is done. That is, coincidentally, one of Sophie’s top dinner party tips; always serve a cold starter and I wholeheartedly agree with this.
I always used to think paté was very complicated to make. I mean something so delicious must be tricky to knock up? Well, actually no. Chicken liver paté is dangerously easy to make. I say dangerously because when you see how much butter is in there, it is a little dangerous. But, as Sophie said, life is for enjoying and you have to weigh up the joy butter brings you and decide that this happiness is so much more important than being a smaller dress size. That being said, i probably didn’t need to eat this entire batch by myself, but it’s just so delicious smothered on hot buttered toast that I kept finding myself gravitating back to the fridge and before I knew it, it was all gone.
Ever since I trained as a chef I made a very loose pact with myself that when I would go to a restaurant I would try to not eat food that I can make myself. It’s a rather good rule, as it makes you more adventurous and experimental with your ordering. If you learn to make this paté it will mean that you will no longer need to order it when you go out, because you will be able to knock this up in no time.
I have to be honest and say I am not great when it comes to offal. I wouldn’t normally order liver. Unlike my sister who absolutely loves them, I always just seem to be very aware that I am well, ….eating liver. Not so with chicken liver paté. It’s so smooth and buttery, and so unlike what it started out as that I have no qualms about gobbling it down. So if you have never tried liver, or tried cooking it, I promise chicken liver paté is a great dish to start with.
Honestly, this is a doddle and it’s delicious. Just add hot toast.
- Author: Margie
- Yield: Serves 6
Ingredients
220g (8 oz) chicken livers
112g butter, cut into cubes
small glug of olive oil
1 clove garlic, crushed
2 tbsp brandy
salt and pepper
For the garnish:
clarified butter
chopped pistachios
edible flowers
chopped chives
Instructions
Trim off any green tinged bits or white unappetising bits off the chicken livers. There’s go getting around it, this bit is a bit grim. You can wear those surgeon style gloves if it helps, otherwise deep breath and on we go.
Cut the chicken livers up into chunks. Melt 10g or so of your butter in a pan and add a glug of olive oil and once the butter is foaming, add the chicken livers. Season well. Fry for about 4 minutes, keep stirring them. You want to have cooked out most of the pinkness, and you want to avoid getting too much of a crust on the outside so keep an eye on them.
Scoop the livers out and pop them in a food processor. Then turn the flame up and put the pan back on the heat and add the brandy. It might burst into flames in a rather alarming fashion, don’t worry, that’s all part of the plan. It will stop once the alcohol has burnt off. Add the crushed garlic. Scrape everything from the pan into food processor with the chicken livers.
Allow it to cool. After about 10 minutes, add the remaining butter and pulse until lovely and smooth. Taste. Add more seasoning if necessary. Scoop into ramekins (or a cling film lined loaf tin). Top with clarified butter and put in the fridge to set.
This keeps for a good 4 days in the fridge and you can freeze it which is always handy.
How to make clarified butter:
Clarified butter is just butter which has had the milk solids removed. To make it, simply melt some butter in a pan and scoop off the white froth that comes to the surface. After skimming off the froth there is clear liquid and you will be able to see white milky solids at the bottom of the pan. Pour the butter into a jug leaving the milky bottom bit in the pan. And it’s as simple as that!


