White Chocolate and Raspberry Cake
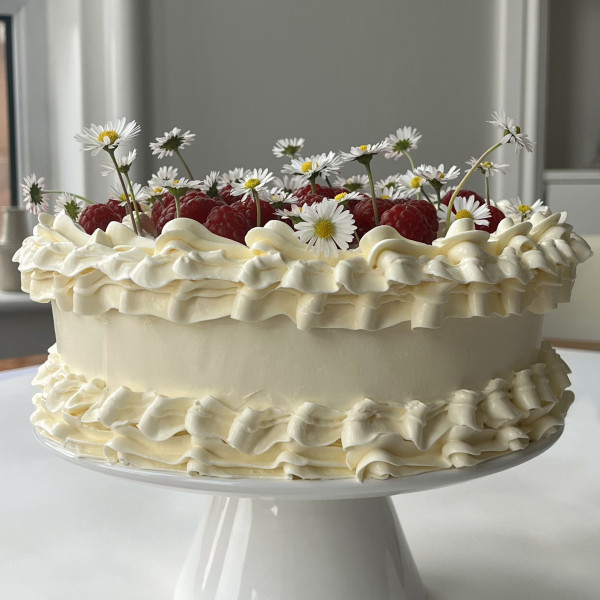
This is a beautiful White Chocolate and Raspberry Cake, perfect for birthdays and more. The balance of tart, fruity raspberries and the silky, sweet white chocolate is perfect.
- Prep Time: 1 hour + cooling time
- Cook Time: 55 minutes
- Total Time: 2 hours
- Yield: Serves 10-12 1x
- Category: Baking
- Method: Oven
- Cuisine: British
- Diet: Vegetarian
Ingredients
For the sponges:
- 250g unsalted butter, at room temperature
- 250g caster sugar
- 1 tbsp vanilla extract
- Zest of 1 lemon
- 3 large eggs
- 230g plain flour
- 2 tsp baking powder
- 1 tsp salt
- 150g fresh raspberries
For the raspberry jam filling:
- 100g fresh raspberries
- 200g raspberry jam
For the white chocolate Swiss meringue buttercream:
- 180g egg whites
- 210g caster sugar
- 350g unsalted butter, softened
- 130g good-quality white chocolate, roughly chopped
- ½ tsp salt
To decorate:
- Fresh raspberries
- Edible flowers
Instructions
- Preheat the oven to 160C Fan and grease and line 2 x 20cm (8-inch) or 23cm (9-inch) round cake tins with non-stick baking paper.
- In a large mixing bowl, beat together the butter and sugar until very light and fluffy. Add the vanilla extract and lemon zest, before gradually beating in the eggs one at a time - add a tbsp of the weighed flour if it looks like it is about to curdle.
- Sift in the flour, baking powder and salt, then mix until just combined - take care not to overmix or else you will end up with a tough sponge (but still ensure there are no lumps of flour remaining).
- Divide the mixture equally between the two tins (you could weigh the batter to be exact or do it by eye) and level the tops. Place the raspberries evenly across the tops of the sponges, pushing them gently into the mixture. Bake in the preheated oven for about 30-40 minutes or until well risen, golden and a toothpick inserted into the centre comes out clean. Leave to cool in the tins for 15 minutes before turning out onto a wire rack to finish cooling completely.
- For the raspberry jam filling: place the jam and the fresh raspberries in a large bowl. Use the back of a spoon to crush the raspberries, and mix well to combine. Set aside.
- For the white chocolate Swiss meringue buttercream: place the egg whites and sugar into a heatproof bowl, or bowl of a stand mixer, and whisk by hand to combine. Place the bowl over a pot with an inch or so of water in it, simmering over a medium heat. Place the egg whites and caster sugar in a heatproof bowl (or the bowl of a stand mixer) and place over a pan of barely simmering water, making sure the water doesn’t touch the bottom of the bowl (otherwise the egg whites will overheat). Gently whisk by hand for a few minutes to combine. Continue to heat the egg whites and sugar, whisking often (constantly if possible), until the mixture reaches 70C - the sugar should be completely dissolved and the mixture hot to the touch.
- Remove the bowl from the heat and whisk using an electric whisk or a stand mixer fitted with the whisk attachment on medium-high speed for 8-10 minutes - or until glossy and stiff (this might take you a bit longer). Keep whisking until the mixture and the bowl is at room temperature - otherwise it will melt the butter.
- Meanwhile, melt your white chocolate in a heat-proof bowl set over a pan of barely simmering water, string occasionally until melted and smooth (make sure the bottom of the bowl doesn’t come into contact with the water). Remove from the heat and leave to cool for about 5 minutes.
- If using a stand mixer, swap the whisk attachment for the beater attachment. Whilst mixing on slow-medium speed, gradually add the softened butter 1 tbsp at a time, ensuring that each tbsp is fully incorporated before you add the next.
- Once all the butter has been added, increase the speed to medium-high and beat until smooth and silky, scraping down the sides of the bowl, if needed.
- Add the salt and the melted white chocolate, then continue to mix on high speed for 5 more minutes. The buttercream is now ready to use.
- To assemble the cake: place one of the sponges onto a flat serving plate or cake board. Top with some buttercream and, using an offset spatula, palette knife or the back of a spoon, spread in an even layer, making sure you reach the edges of the sponge. Try to ensure there is a slight lip at the edges to contain the jam.
- Spoon the jam on top of the buttercream within the lipped edges. Carefully top with the second sponge.
- To crumb coat: pipe or spoon the buttercream on top of the sponges and onto the sides - take care not to use too much. Use your offset spatula or palette knife to spread it out across the cake, covering the top and sides. Next, use a scraper to remove excess buttercream from the top and sides of the cake - you don’t need to remove too much of the buttercream, you just need to even it out. Use your spatula or scraper to smooth out any excess that has accumulated on top of the cake from scraping the sides. Place the crumb coated cake in the fridge for 30 minutes - or until the crumb coat has set.
- Once the crumb coat has set, proceed with the final layer of buttercream, using a similar method of application and distribution as the crumb coat - but without removing the excess. I find it a lot more enjoyable decorating cakes when I’m less concerned about making them look ‘perfect’ - so have fun when decorating! If you plan to pipe some buttercream onto your cake, keep this in mind when doing the final layer to ensure you leave yourself enough to use.
- Pipe any decoration, if doing, and decorate with fresh raspberries and edible flowers, if using.
Notes
Scroll up for a step by step guide with images to help with all steps of this cake.
To store: Store the cake in an airtight container in the fridge for 4 days. Cakes are always nicer at room temp so remove from the fridge 20-30 minutes before serving for best texture.
To freeze: You can freeze the cakes, undecorated. Leave to cool, wrap tightly in clingfilm and an outer layer of foil. Freeze for up to 3 months. Thaw overnight when ready to use. For the Swiss meringue buttercream, freeze for up to 3 months in a freezer bag or airtight container. When ready to use, bring to room temperature. Transfer to a bowl and whip with an electric whisk for a few minutes to bring it back together and so it regains its fluffiness. The rapsberry filling is so quick, I would make it fresh for best results!
Make ahead: The cakes themselves can be made a day ahead. Cool them and wrap really well in clingfilm and place in the fridge. You can then decorate and assemble the cake. Raspberry compote can be made 3 days in advance and keep in the fridge until ready to use. Swiss meringue buttercream can be made and covered at room temperature for day. It can can be made and refrigerated for up to 2 weeks in an airtight container. Bring to room temperature when ready to use.
Frozen raspberries: I wouldn't use frozen raspberries in the cake batter as they can leak out too much moisture which changes the cake texture, so stick to fresh. For the jam filling, you can indeed use frozen raspberries. Remove from freezer beforehand to soften them a bit and then you can mash them into the jam.
Crumb coat: You might be tempted to skip the crumb coat, but I wouldn't advise if you want the cake to have a nice clean finish. It's really easy, just takes chilling in the fridge.
Other fruit: You could also use cherries and cherry jam, strawberries and strawberry jam or blueberries and blueberry jam. All would be delicious!
Find it online: https://desertislanddishes.co/white-chocolate-raspberry-cake/