Poffertjes (Dutch Mini Pancakes)
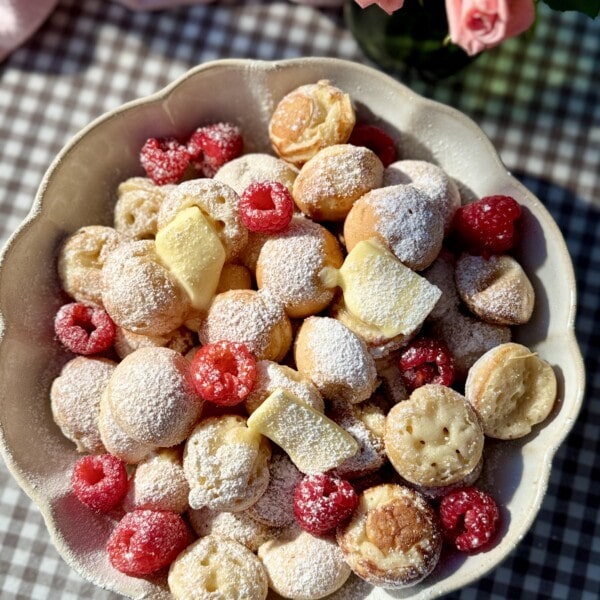
These delicious poffertjes (A.K.A ‘Dutch mini pancakes) are an irresistible treat. Imagine dainty puffed up pancakes topped with melting butter and a dusting of sweet icing sugar. Perfect for breakfast, brunch or dessert - and ideal for Shrove Tuesday (pancake day)!
- Prep Time: 10 minutes
- Proving Time: 30-60 minutes
- Cook Time: 20 minutes
- Total Time: 30 minutes + proving
- Yield: Makes 50 poffertjes 1x
- Category: Pancakes
- Method: Stove
- Cuisine: Dutch
- Diet: Vegetarian
Ingredients
- 350 ml full-fat lukewarm milk
- 7g (2 ¼ tsp) fast action instant yeast
- 15g (2 tbsp) caster sugar
- 250 g (1¾ cups) plain flour
- Pinch of salt
- 1 large egg
- Unsalted butter, for greasing
To serve:
- Unsalted butter
- Icing sugar
- Fresh raspberries
Instructions
- Firstly, make sure your milk is lukewarm. I like to use the microwave and heat in 30-second increments. You just want it warm so if you hold your hand against it, it’s not too hot or too cold. If it is too hot, let it cool slightly or it will kill the yeast. If you have a thermometer, it should be between 38-46°C.
- In a large jug, mix together the lukewarm milk, yeast and sugar. Leave to sit for about 10 minutes - or until frothy and bubbly. Technically, you don’t need to do this with fast action yeast, but I always like to check to ensure it is active and working.
- Next, add the flour and salt to a large mixing bowl. Pour in the milk, followed by the egg, then whisk well until you have a smooth batter.
- Cover with cling film or a clean tea towel and set aside to rest in a warm place for about 45 minutes to 1 hour - or until really bubbly and roughly doubled in size. If your house is colder, it might take a little longer. Make sure it doesn’t over-prove or it will develop a sour flavour.
- When the poffertjes batter is ready, place a poffertjes pan or large non-stick frying pan over a medium heat. Once hot, grease generously the cavities of the pan with butter (or the base of the non-stick frying pan) - either by brushing with a pastry brush or piece of buttered paper.
- Pour the poffertjes batter into a squeezy bottle (or use a small cookie scoop, ladle, piping bag or jug) and fill each hole of the poffertjes pan with batter until nearly at the top. If you don’t have a poffertjes pan, you can just squeeze out small rounds (you want to use around 1 tbsp of batter for each one - depending on the size you want your poffertjes). Cook for a few minutes or so - or until bubbly on top and golden underneath (use a toothpick to gently lift up and check). Quickly and carefully, flip the poffertjes over and cook for another minute or so on the other side. The exact time it takes to cook each side will depend on a) the amount of batter and b) the heat of your pan. Watch closely and adjust the heat/cooking time accordingly - take care not to overcook. Remove from the pan and place onto a heatproof dish or plate. Cover with foil and place in an 100c oven to keep warm. Repeat with the remaining batter until you have around 50 poffertjes.
- Serve the poffertjes warm topped with a knob of butter, a dusting of sieved icing sugar and fresh raspberries.
Notes
Scroll up for a helpful step by step guide on how to make poffertjes.
To store: you can make the poffertjes batter the day before and keep covered and chilled in the fridge overnight - although don’t be tempted to push it any longer. The cooked poffertjes can be kept in an airtight container in the fridge for up to 2 days.
To reheat: you can reheat the poffertjes in the microwave in a loosely covered microwave-proof container. The exact time will depend on the number you are reheating and the strength of your microwave - I like to do 15-second blasts until hot. Watch closely as you don’t want to overheat them or they will become rubbery. Alternatively, preheat the oven to 180°C/160°C Fan and bake on a lined baking sheet for about 6 minutes - or in an airfryer at 180°C for about 4 minutes. You can also reheat in a buttered non-stick frying pan over low heat for a couple of minutes, flipping to cook on both sides.
To freeze: you can freeze the cooked poffertjes in a sealed container for up to 2 months. Defrost at room temp before reheating.
Make ahead: you can make the poffertjes batter the day before and keep covered and chilled in the fridge overnight - although don’t be tempted to push it any longer. Proving it in the fridge slows down the process so it can be left overnight without risking over-proofing the batter.
Milk temperature: make sure your milk is lukewarm - if you have a thermometer, it should be between 38-46°C. Too hot and it will kill the yeast, too cold and it will slow down the fermentation process.
Chef’s perk: like classic British pancakes, you may find the first few poffertjes look a little less than perfect. Don’t panic! You will soon get the hang of it as you go onto the next batch and familiarise yourself with the pan, batter and technique. Just set the first few aside as a chef’s perk. Quality control is very important…
Poffertjes pan: it is worth investing in a poffertjes pan if you plan on making these regularly. However, if you don’t have one, don’t panic. Simply use a good-quality large non-stick frying pan.
Serving suggestions: traditionally, poffertjes are served with melted butter and icing sugar. However, they are also delicious ebelskivers-style with jam or nutella. I also love them with my easy homemade pistachio cream or a drizzle of maple syrup (see Substitutions and Variations for more ideas).
Find it online: https://desertislanddishes.co/poffertjes-dutch-mini-pancakes/