Lemon Meringues
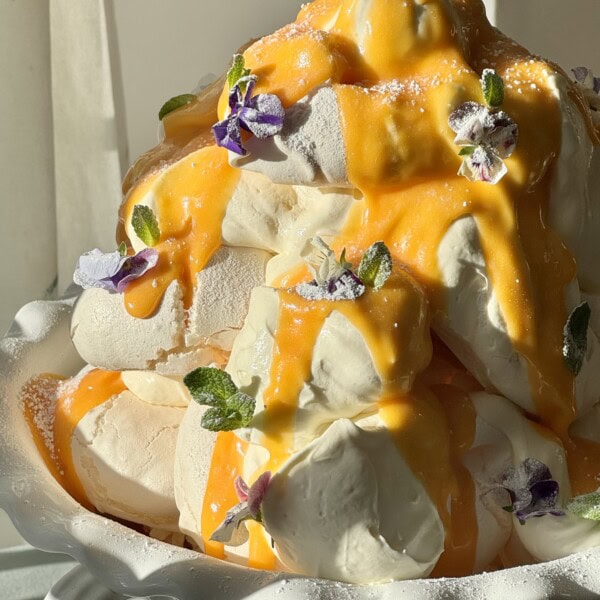
These delicate lemon meringues are the perfect dessert for a special occasion. Imagine sweet meringues, with a crisp outside and irresistibly chewy inside, topped with whipped cream, zesty lemon curd and fruity berries. So good.
- Prep Time: 20 minutes
- Cook Time: 1 hour
- Total Time: 1 hour 20 minutes + cooling
- Yield: 12 meringue nests 1x
- Category: Baking
- Method: Oven
- Cuisine: Global
- Diet: Vegetarian
Ingredients
For the meringue nests:
- 8 large egg whites, at room temperature
- Pinch of flaky sea salt
- 500g caster sugar
- Zest of 1 large lemon (you will need the zest and 10ml lemon juice)
- 2 tsp cornflour
- 10ml lemon juice
For the lemon curd: (optional)
- 100g caster sugar
- Zest of 2 large lemons
- 5 large egg yolks, at room temperature
- 80ml lemon juice
- 60g unsalted butter, diced
To serve: (optional)
- Lemon curd
- Lightly whipped cream (you will need around 600ml double or whipping cream)
- Fresh fruit
Instructions
- Preheat the oven to 180ºC/160ºC Fan. Line 2 large baking sheets with non-stick baking paper and set aside.
- Place the egg whites into the bowl of a stand mixer, making sure it is spotlessly clean and dry. Add a generous pinch of flaky sea salt. Whisk on a low speed until foamy, then gradually increase the speed to medium and continue to whisk until soft peaks form (this will take about 3-4 minutes).
- Meanwhile, in a separate bowl, mix together the caster sugar and lemon zest using your fingertips (this releases citrus oils in the zest which makes it more zingy).
- Increase the speed of the mixer to medium-high, then gradually add the lemon sugar a spoonful at a time. Make sure that each spoonful is completely whisked in before adding the next. Continue until all the sugar has been added and you have a smooth and shiny meringue that holds its shape when turned upside down. This should take about 5 minutes.
- Sieve in the cornflour and drizzle in the lemon juice. Fold to combine.
- Lift the non-stick baking paper up from the baking sheets and dab a bit of the meringue on the corners, then recover with the non-stick baking paper (this will help stop it from slipping).
- Using 2 spoons, scoop equal-sized mounds of the meringue, spaced apart, onto the prepared baking sheets (you should have around 12). Use the back of a spoon to make a little indentation into the centre of each meringue (this will leave space to add your lemon curd).
- Place the trays into the oven, then reduce the temperature to 150ºC/130ºC Fan and bake for 30 minutes. Turn the oven off and leave the meringues inside for another 30 minutes. Then remove from the oven and leave to cool completely (they should be crisp on the outside but deliciously chewy on the inside).
- Meanwhile, make the lemon curd (optional): In a large heat-proof glass or ceramic bowl, mix together the sugar and lemon zest using your fingertips. Rub together until clumpy and totally mixed. Add the egg yolks and, using a rubber spatula or silicone whisk, whisk until thickened, pale and slightly foamy.
- In a large saucepan, heat the lemon juice over medium-high heat until it just comes to a boil. Remove from the heat and gradually pour over the foamy lemon-sugar egg whites, whisking constantly until all the lemon juice has been added.
- Return the lemon-egg mixture to the saucepan and cook over low heat, stirring constantly until thickened enough to coat the back of a spoon - this should take around 5 minutes. Make sure you keep it over a gentle, low heat and stir constantly - if you leave it or let it boil, you will end up with a peculiar lemon scrambled egg yolk situation (not what we are looking for!).
- Once it has thickened, remove from the heat and gradually add the butter. Stirring to ensure it is fully melted and incorporated. Pour into a jar and leave to cool completely before covering and chilling in the fridge.
- To serve: place the cooled meringues onto a serving plate and top with dollops of lightly whipped cream, a spoonful of lemon curd and fresh fruit. Alternatively, build into a tower and dollop over the cream before drizzling over the lemon curd. Enjoy!
Notes
Scroll up for a helpful step by step guide for the meringues.
To store: the meringues can be made ahead and stored undecorated in a sealed container for up to 2 weeks at room temperature. The lemon curd can be stored in the fridge for up to 1 week. Once decorated, these lemon meringues should be eaten as soon as possible or they will go soggy.
To reheat: these lemon meringues (both the meringues and lemon curd) are served at room temperature so you don’t need to worry about reheating.
To freeze: you can freeze the meringues in an airtight container, layered with non-stick baking paper, for up to 1 month. Take care when defrosting to ensure they do not absorb any moisture as this will soften their outside. I suggest removing them from the containers and placing them on wire racks until completely thawed. This will take around an hour - I recommend using them as soon as possible afterwards. You can freeze the lemon curd for up to 1 month. Defrost fully in the fridge before using.
Clean, dry bowl: it is really important to make sure your bowl is completely clean and dry before you add the egg whites. Any traces of liquid or fat will stop them from whisking up.
Piping: if you prefer, you can transfer the meringue mixture into a large piping bag fitted with a nozzle of choice. Then pipe around 12 mounds onto the baking sheets. Use a spoon to flatten and make a slight dent on the surface to hold the lemon curd.
Metal-free equipment: when making the lemon curd, try to avoid using metal kitchen equipment. I find it gives the lemon curd an odd metallic taste.
Whipped cream: take care to whip the cream just to medium peaks for the decoration - if you over whip, it will split and you will eventually get something akin to butter.
Flavoured whipped cream: you can add a couple of drops of vanilla extract of vanilla bean paste to the whipped cream, if you like. Alternatively, make a delicious lemon whipped cream by swirling the lemon curd through the cream as you reach soft peaks.
Find it online: https://desertislanddishes.co/lemon-meringues/